
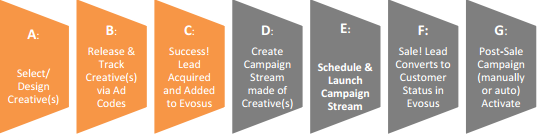
The start of the acquisition process is typically the selection of a Creative designed to both attract potential customer attention in a given customer Interest(s). The end of the Lead Acquisition phase is when a Lead is added to your database via import from a purchased customer list, outside CRM (Customer Relationship Management) import, or through manual entry – such as a Quote.
Examples
-
Direct mail flyer (Creative) for Spas (Interest).
-
Radio spot (Creative) for Chemicals (Interest).
-
Phone campaign (Creative) for Pool Maintenance (Interest).
-
BBQ event onsite (Creative) for BBQs (Interest).
-
Tradeshow booth (Creative) for Hearths (Interest).
Reports
Creatives in the Lead Acquisition phase are designed to generate new business in a customer Interest category. Therefore, report tracking of Lead Acquisition effectiveness ends when a new Lead is entered into Evosus and an Interest category is assigned via ‘New Customer Interest Tab’ – below.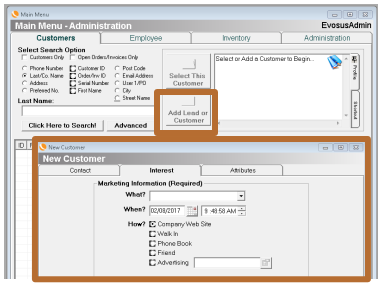
Additional reports are available once a sale occurs in the next phase. Reports include:
-
Cost Per Inquiry: Compares the total advertising costs with number of inquiries and number of sales received.
-
Sales by Advertising Code: Compares different codes against each other to see which is the most successful. Includes only Sales and Service A: Select/ Design Creative(s) B: Release & Track Creative(s) via Ad Codes C: Success! Lead Acquired and Added to Evosus D: Create Campaign Stream made of Creative(s) E: Schedule & Launch Campaign Stream F: Sale! Lead Converts to Customer Status in Evosus G: Post-Sale Campaign (manually or auto) Activate Lead Acquisition 6 Orders (this report can be used in both phases dependent on filters used).
-
Lead Register: How many new Leads are being recorded in a given date range.
-
Lead Analysis: Analyze the status of all Leads in the Lead Acquisition phase.
Add Advertising Cost Types, Creatives for Advertising Codes, Create Advertising Codes, and test Advertising Codes:
A free simulation for this process can be located with the directions on the title page. Adding a new Creative requires adding Cost Types, then Creatives, then Advertising Codes, which attach one Creative and at least one Cost Type to each Advertising Code.
The 4-Step process is:
-
Add Advertising Cost Types
-
Go to Administration > Marketing > Lead Acquisition > Advertising Cost Types.
-
Click ‘Add’ (or skip to Step 2 if Cost Types needed are already available in the grid).

-
Enter the name of a Cost Type, such as Design & Setup or Media Buy.
-
Repeat until all Cost Types are entered.

-
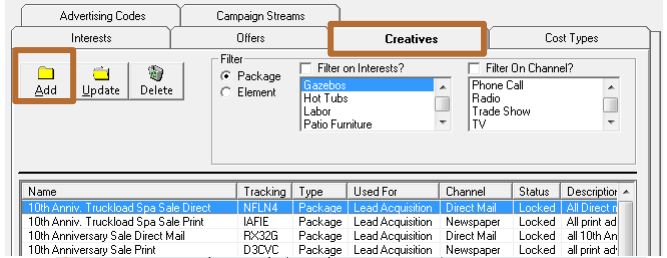
Add Creative for Advertising Code
-
Go to Administration > Marketing > Creatives. (It’s also the tab next to ‘Cost Types’).
-
Click Add (or skip to Step 3 if you are reusing a previous Creative. A reused Creative will require a unique Advertising Code).
-
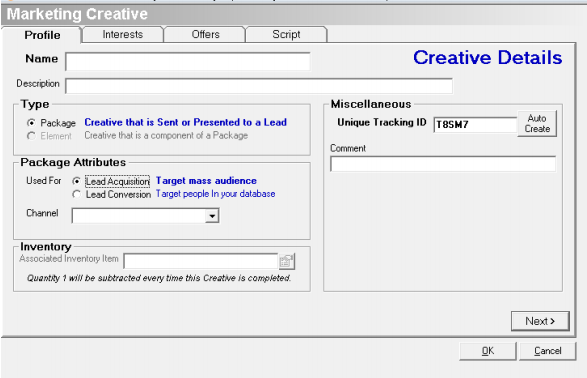
Profile Tab:
a. Enter Name and Description for the Creative.
b. Type: Choose ‘Package’ Radio Button (ignore the grayed out ‘Element’ button).
c. Select ‘Lead Acquisition’ radio button.
d. Select a Channel from the drop-down menu.
e. The Inventory option is grayed out in this phase but would become available if this was a Lead Conversion Creative.
f. Miscellaneous: You can create up to 5 digit unique identifiers to be able to sort the Creatives pick-list more easily if desired.
-
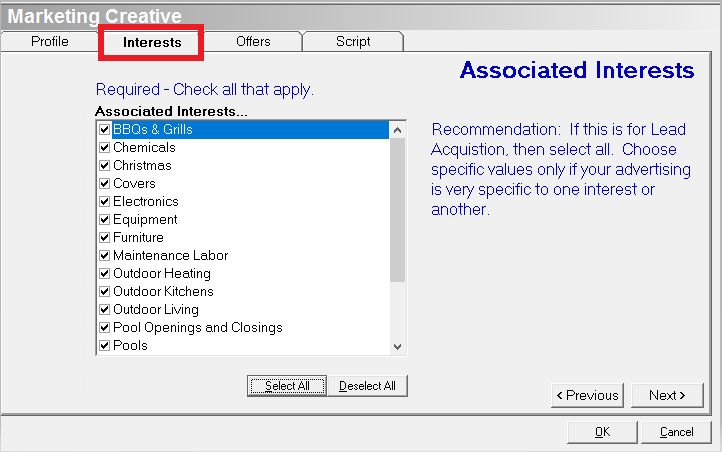
Interests Tab: in Lead Acquisition, you will typically select all Interests because you want to associate all-new Leads to this Creative upon entry into Evosus. During Lead Conversion, you might select fewer Interests, so your metrics can be more precise.
-
Offers Tab: (Optional) Select if you want to add an Offer. Once this Offer is associated to a Creative, the Offer will:
a. Automatically be populated in the Sales Profile grid shown below for all Customers that share the Interests checked off in Step b above.
b. Allow the salesperson to checkbox a single offer (multiples may be available) underneath the grid header reading – ‘Please check the offer the customer is taking advantage of’
c. Not be available for selection or tracking inside a POS Order (it was designed for larger purchase items that would need a Sales Order).
d. Require a manual discount even if selected

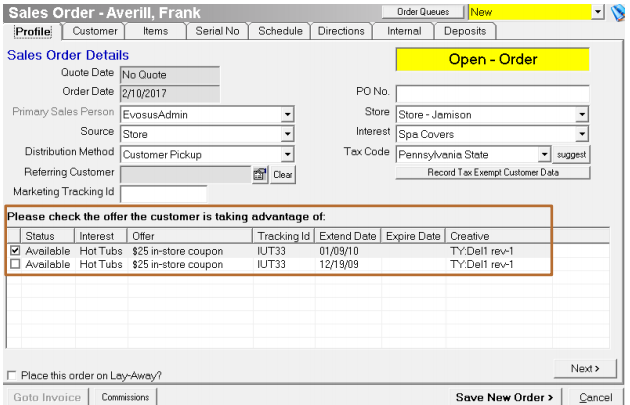
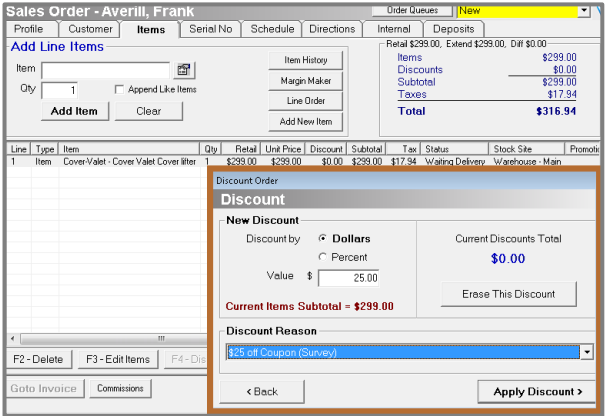
e. If the offer is monetary (% or $ off): use the Sales Order (not POS) to process it. Then, adjust pricing with a Discount.
f. If the Offer is inventory related (a free item with purchase): The free inventory ‘Offer’ is shown as an option available to be checked in the Sales Order ‘Profile’ grid. This item is *not* removed from inventory, so you will have to adjust with a stock adjustment.
-
Script Tab: (Optional) If the Creative is a phone campaign, or has an associated script you want your employees to repeat with specific points they need to cover, enter it here.

-
Click OK to save
-
Create Advertising Code and associate it to a Creative and Vendor (see title page for free Advertising Code simulation)
-
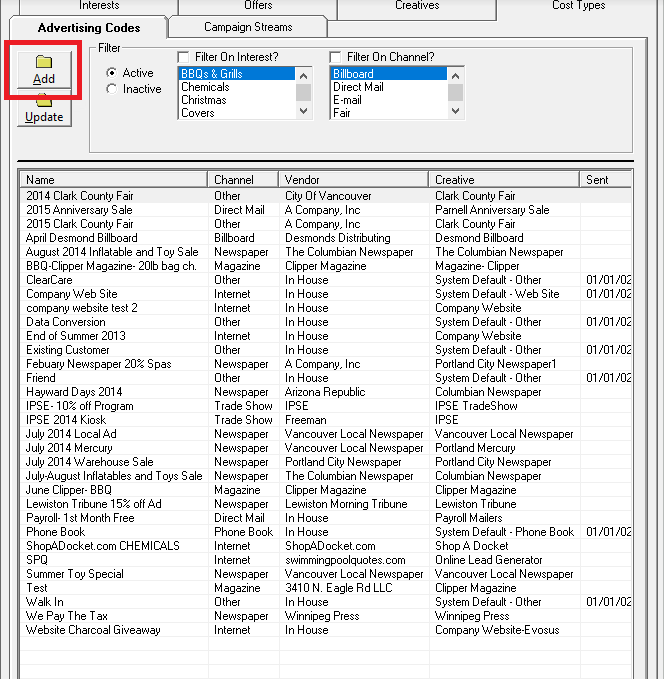
Go to Administration > Marketing > Lead Acquisition > Advertising Codes.
-
Click ‘Add’.
-
Enter a Name and Description for the Advertising Code.
-
Select the newly made Creative (from Step 2) from the drop-down list. This associates it to this Advertising Code. Alternately, you can press the ‘Add New Creative’ button if you want to make a Creative from this screen. E. Select a Vendor from the list that is providing the advertising. If there is no fee or the event is in-house, you should still select the vendor that would normally receive a fee or choose ‘In House’ for ROI tracking purposes.

-
Click ‘Save and Add Scheduled Event’. A new screen appears like the one below:
-
Select the ‘Schedule’ tab.
-
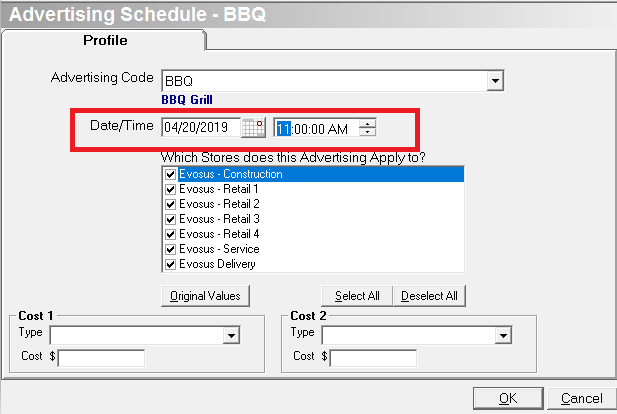
Select the date and time the advertisement is scheduled to run. If you choose a date in the future, the Advertising Code will NOT be available to select as an advertisement in the screen shown below until that date arrives. Best practices for these Offer examples:
a. Magazines: enter the date the magazine is distributed rather than the publication date (which is generally later than the distribution date).
b. Direct Mail: enter the date the Creative is mailed out.
c. Unsure: enter today’s date and it will become available today.
d. Ongoing Runs:
- Decide on a recurring cycle (i.e. monthly or quarterly)
- Save recurring cycles by repeating Step 3 above for each Advertising Code needed. Pro tip: Remind yourself it’s time to create more by adding an Action Item to your own list.
- If the Advertisement is not applicable across all stores, then select only the applicable stores. Keep in mind that the Advertising Code will ONLY appear for users logged into the selected stores. When in doubt, select all the stores.
e. Select one or more Cost Types from the drop downs and enter the cost for each type. This feeds the calculation for ROI per Advertising Code. For instance, if you ran a Newspaper ad, you should separately enter both the cost to design (Cost 1) and run (Cost 2) the ad.
f. Click ‘OK’ to save the schedule.
g. Additional costs can be entered if desired:
- Go to the ‘Advertising Name’ screen. Find the ‘Schedule’ tab.
- Double click the desired Advertising Code line or Select ‘Update’. To open the ‘Advertising Schedule’ screen.
- Find the ‘Costs’ tab. Select ‘Add’
-
Test the Advertising Code Created in Step 3

-
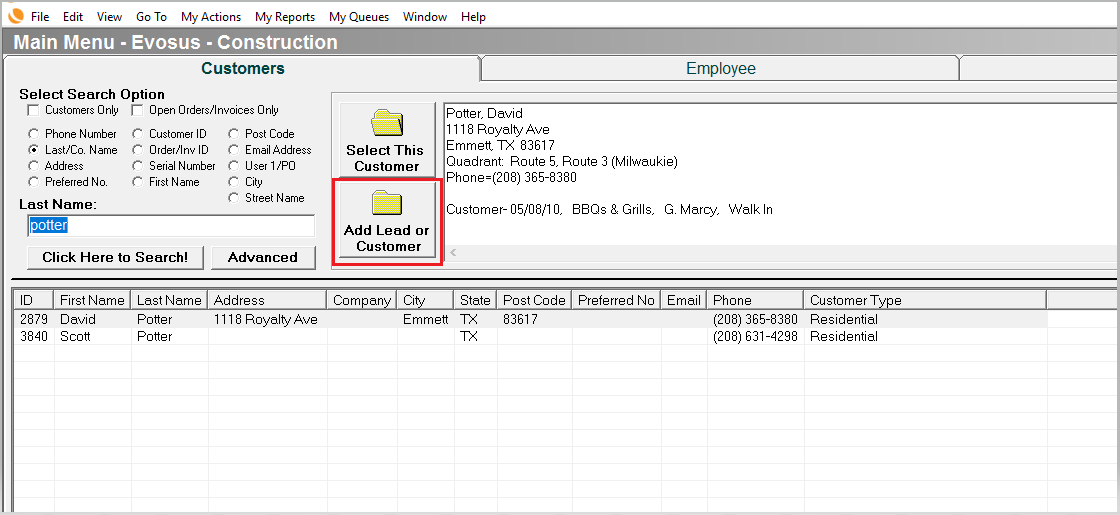
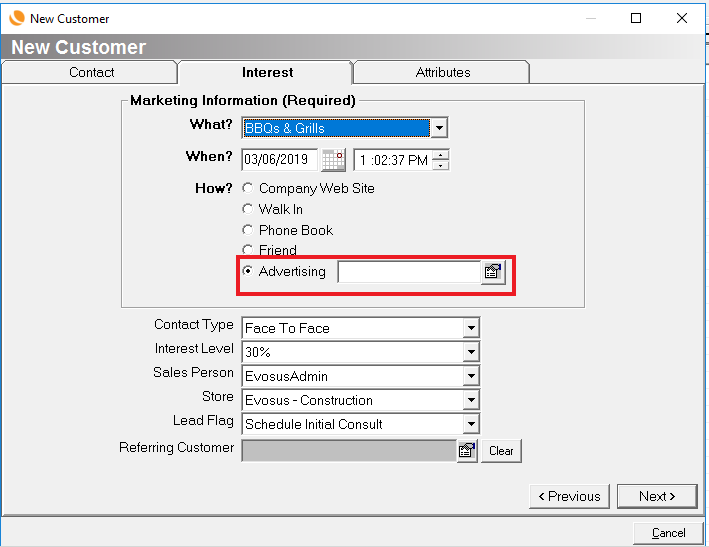
Go to the main Customer screen and click ‘Add Lead or Customer’.
-
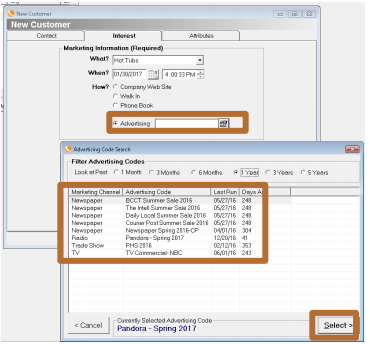
At the ‘Interest’ tab select an Interest from the drop down that was associated to the Advertising Code you are checking.

-
Select the ‘Advertising’ radio button. Press the search button and locate the Advertising Code you just entered.
-
If the Advertising Code is not visible check:
a. The radio buttons at the top of the screen to include additional Advertising Codes by date.
b. Scroll down to the bottom of the list to search. (A long list is why it’s recommended that ongoing Creatives are saved and separated into multiple Ad Codes – to keep the current one near the top).
- Highlight the Advertising Code you are testing and click ‘Select’.

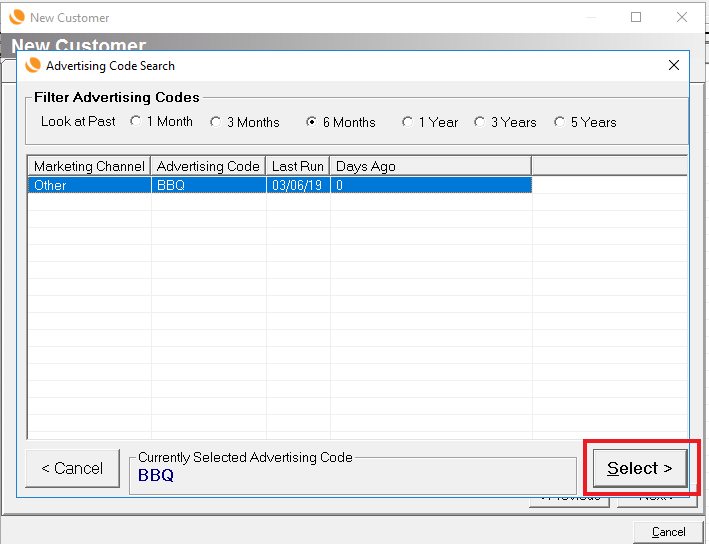
-
Back in the new customer screen, you should see the Advertising Code populate in the Advertising field. If the code doesn’t populate, you should retrace your steps in the Lead Acquisition section of this guide.