
Starting A Physical Count:
-
When the counts are being completed, have your inventory manager verify the counts.
-
Start with your most popular items. These items can contain the most counting errors because of their turnover rate. Evosus can filter the count by fast moving items, which will expedite the count process.
-
As soon as the counts are verified, enter them into a spreadsheet or upload the data via your barcode scanner.
-
Reviewing all data entered for discrepancies, prior to completing a count, will avoid you having to conduct a second or third count.
-
Once the count is complete, hold another team meeting to discuss the process and procedures. Discuss what worked, what didn’t, and what you could change for future counts. The end goal here is to gather ideas on how to make your next count run more smoothly.
Step by Step:
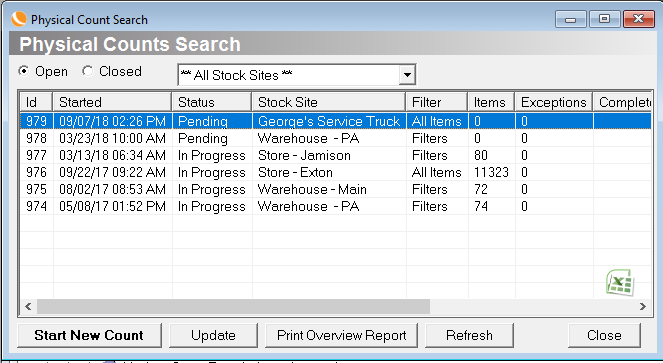
- Open the Physical Count Search screen (Administration > Inventory > Utilities > Physical Count).
-
Click Start New Count. The New Physical Count screen appears.
-
Stock Site - Select the stock site you are counting.
-
Items scanned using the P360 memory scanner that is NOT included in the count, based on selected filters, will be appended to the count sheet.
-
The following filters are applicable to manual paper counts ONLY and dictate which items will be listed on the count sheet.
a. Product Lines: To select a product line department, select Product Line Department, and then click  .
.
b. Item Class: Item classes are a calculated value that displays the popularity of an item using a letter grade (A-F).
c. Ignore Zero Count On Hand Items: Exclude all items in inventory with a current On Hand quantity of 0. These items will not print on the Physical Count List. Keep in mind the quantity in Evosus might be 0, but the actual count may be different. This may or may not be useful to you.
d. Include Do Not Sell Items: Include items that do not have the Sell This Item box checked on the Item screen (Inventory > Open an item > Options tab).
e. Vendors: Only items associated with the selected vendor (primary or secondary) are included in the count.
- Vendors are associated with an inventory item using the Vendors tab on the Items screen (Inventory > Open an item > Vendors tab).
f. Bins - Physical Count will only include items assigned to that bin. Bins/locations are created using the Locations tab of the Stock Site screen (Administration > Inventory > General Setup > Stock Sites > Open a stock site).
-
Click Next. Review Negative Quantity Items screen appears, which will display a list of items with a negative balance. We recommend reconciling these items before starting the physical count.
-
Click Next. Review items on order screen appears, which shows a list of items on open orders Review these items to confirm everything is properly marked as delivered and invoiced.
-
Click Next. Review Job Materials screen appears, which shows a list of items on jobs. Review these items to confirm everything is properly marked as delivered.
-
Click Next. Review Items on Purchase Orders screen appears, which displays a list of items currently on open purchase orders. Review these items to confirm all item receipts are up-to-date.
-
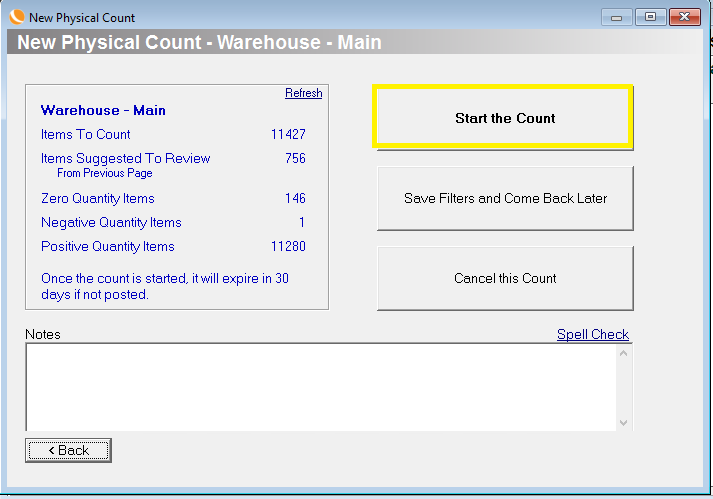
Click Next > Click Start the Count > Click YES on the confirmation message that appears. The Physical Count screen appears.
-
The physical count has been created.
-
Use the Reports tab to generate physical count sheets.
-
Use the Import tab to import the physical counts.
Related Video Content:
This video describes the details of preparing for and starting a physical count, including physical count filters, cycle counts, and the importance of resolving as many open inventory transactions as possible.