
Add a new lead or customer to the application to track all marketing, sales, and service information pertaining to that person. Adding a Lead to the system triggers the marketing in Evosus® by creating Action Items reminding salespeople to follow up with the active lead. Adding a New Customer to the system allows you to create Sales and Service Orders and track all the customer's purchases and warranties. All this information is stored in the Customer Profile.
Add a New Lead or Customer
- Complete the Contact tab.a. Open the Customer tab on the main menu.
b. Click Add Lead or Customer. The New Customer screen appears.
c. (required) Enter the First Name and Last Name.
d. Company Name: Complete this field if the customer is a commercial account.
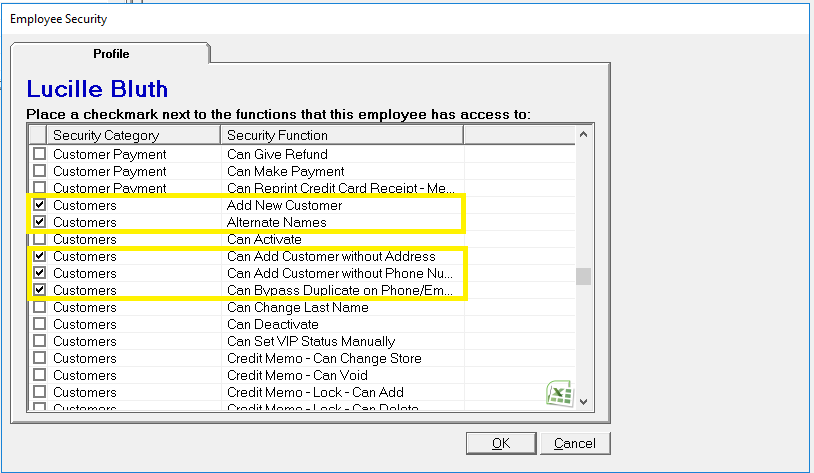
e. Address, City, State, Post Code: This field is not required if you have the proper security permissions.
- Click the Lookup link to validate the address. Evosus will return the correctly formatted address as well as a nine-digit US postal code. Click the blue Map link to plot the address using Yahoo!® Maps.
f. Phone Numbers: This field is not required if you have the proper security permissions.
g. Email: Enter customer email.

-
Click Next.
- Complete the Interest Tab:
-
Required What?: Select the Interest that brought the lead/customer to the store. This determines which marketing campaign stream the lead/customer is added to.
-
Required When?: Change this if you are adding the lead/customer after they came into the store.
-
Required How?: It is important to track how leads/customers find your company so that you can track the effectiveness of advertising.
-
Contact Type: Some companies and salespeople like to record how the initial contact with the customer took place, whether it was Face to Face, Internet/Email, or a Phone Call. You can then use this information when creating Marketing Lists.
-
Interest Level: Sales can use this information to prioritize leads.
-
Sales Person: Defaults to your user name.
-
Store: Defaults to the store you are logged into. Only the stores you can log into appear in the list.
-
Lead Flag: This is another way to categorize leads. Use the Search Lead Flags screen (Administration > Sales > General Setup > Lead Flags) to create and maintain the lead flags that can be assigned to a lead/customer.
-
Referring Customer: Click on the search button and search for the referring customer. The referring customer will then have a list of customers they have referred within their Customer Profile.

-
Click
 to select an advertising code, Use the filters to expand the search if the advertising code does not appear in the list
 -
Click Next.
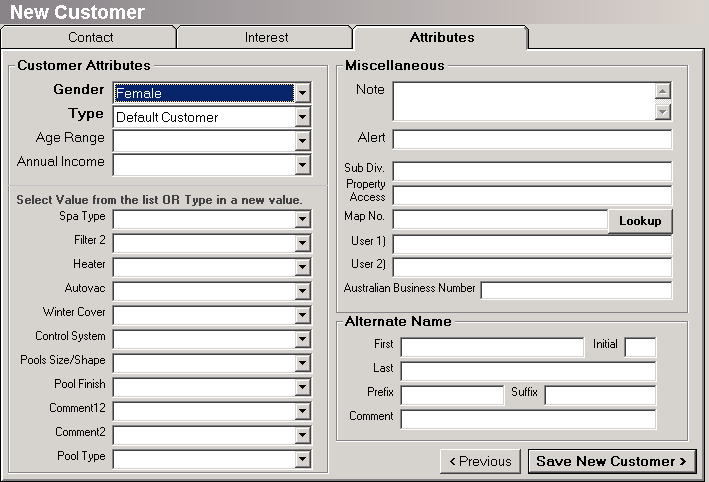
- Complete the Attributes Tab
-
Required Gender: This is helpful if you want to generate a marketing list based on gender. Use store defaults to From Store Defaults, the default can be changed to have the gender default to either Male or Female so it does not need to be entered by an employee.
-
Required Type: Select the customer type. For example - Commercial, Residential, or Wholesale. By default, this field populates with the default customer type set up using the Customer Types screen (Administration > Accounting > General Setup > Customer Types > Default to this customer type when adding new customers). Special pricing and late fees are associated with customer types.
-
Age Range and Annual Income
-
All values below Annual Income are completely customizable to your company. If your company requires any of these attributes to be filled in, select an option from the pull-down menu or type in a new value. Once a new value has been entered, it cannot be deleted.
-
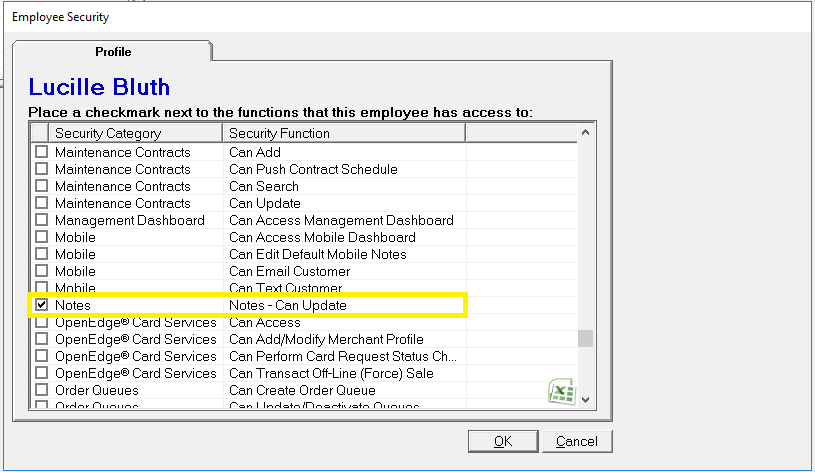
Notes: Use this field for internal notes. For example - customer questions, comments, or issues. Notes input in this field will appear on the Notes tab of the Customer Profile.
-
Enter any alerts for this lead or customer. An alert is used to notify other employees about something specific to this customer or their account. Alerts pop up whenever this customer's account is accessed, whether it is from POS or the Main Menu. Examples of alerts might be "COD," "Give them 10% off next purchase," "Has a dog named Ralph" or "was looking at the BBQ's last time." Alerts can be updated and deleted from within the customer profile.
-
User 1 and User 2 fields can be used to store any information you would like. They will appear in the customer profile. Helpful Hint: Try and make sure these fields are used for the same purpose by all employees so there are no questions as to what the information in the User 1 field means.
-
Alternate Name: Nicknames, children, spouses, friends, and roommates can be added as Alternate Names so you can search by either name and the same primary account will be opened. Example: If Bill Smith has his sister Jill Johnson as an alternate on his account you may search by Johnson or Smith and the system will still pull up Bill Smith's
-
Click Save New Customer.
-
The system checks for a duplicate record. If the customer already exists, you can open the existing record, or save the customer anyway. You need the 'Can Bypass Duplicate' permission set in order to create the duplicate record (see Security Permissions Required).
Security Permissions Required
Implications - Marketing
-
If gender default is set at either male or female and is not changed, then campaign streams cannot be run to market men vs. women. This information will not be accurate. If you do not wish to run lists or campaign streams targeting one gender or another, then this will have not direct ramifications on your company.
-
If advertising "How" is defaulted and not changed, then advertising cost and revenue information will not be accurate. It is not recommended to default this option unless you do not wish to track advertising information in Evosus.
Related Reports
-
Customer Dump To Excel (Administration > Reports > Marketing > Leads > Customer Dump to Excel) - Exports all customers in the database to excel.
-
Lead Analysis (Administration > Reports > Marketing > Leads > Lead Analysis) - Analyze the status of all the Leads in your database. These are the people who have not purchased. This report is different from the Customer Inquiries report in that the Customer Inquiries report has everyone who has purchased and who have not purchased.
-
Lead Closing Ratio (Administration > Reports > Marketing > Leads > Lead Closing Ratio) - View the number of leads compared to the number of sales and the lead closing ratio per product line and employee.
-
Referral Sales (Administration > Reports > Sales > Orders and Invoices > Referral Sales) - View referral sales for a given period of time. Use this report to see which customers are making referrals.