
Maintenance contracts are automated. You create them once, and the service orders and tasks are automatically created based on the contract information.
There are two ways to create a maintenance contract:
- Manually
- Based on a saved template.
Once the contract is created, it has a status of Open-Draft. This means the customer/prospect name has been recorded and the sales process has begun. Pre-sale marketing campaigns will also begin at this time.
Create a New Maintenance Contract - Manually
- Open New Contract screen (Customer > Select a customer > Contracts tab) or (Administration > Maintenance Contracts > Add contracts).
-
Customer – select or add a new customer.
-
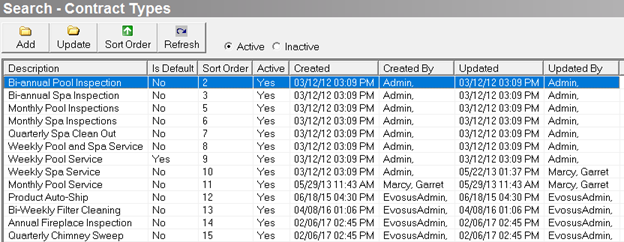
(Administration > Maintenance Contracts > General Setup >Contract Types).Contract Type - Select the type of contract you want to create. Contract types are
-
Contract Name - Input the name of the contract.
-
Click OK when complete. This creates the new contract and opens it in the Contract screen.

-
Input basic information about the contract
-
Open the Profile tab.
-
Referring Customer - Select a Referring Customer (if applicable). All subsequent orders created from the Contract will display in the Referrals section of the Referring customer's profile.
-
Notify Employee - This is the employee that will receive Action Items about the Contract. Action items include Contract Expiring and Contract Completed.
-
Comment 1, Comment 2 - Comment 1 will display in the Search Contracts queue. The comments entered in these fields will not print on any forms.

-
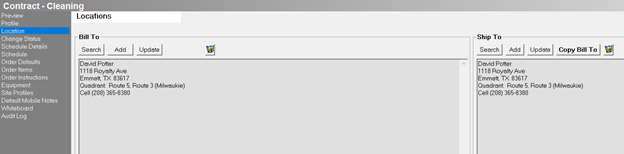
Review/update the bill to and ship to locations
-
Open the Location tab and verify that the bill to and ship to locations are correct. These addresses will be used on all orders created from this contract.
-
Click Add to add a new location or Update to change the existing address.
-
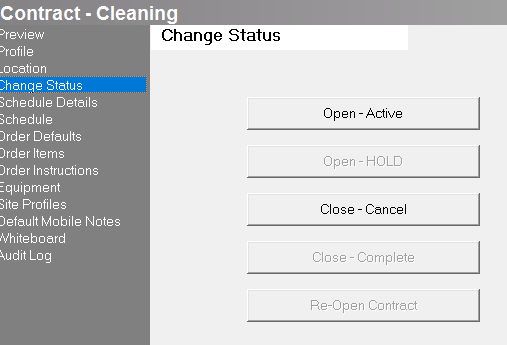
Change the status of the contract
-
Use the Change Status tab to change the status of the contract.
-
Open-Draft: The Contract is being created. No orders or tasks are created while a contract is in the Draft status.
-
Open-Active: The customer accepted the contract and Evosus is auto-creating orders and tasks.
-
Open-Hold: The contract is still active, but orders and tasks are not being generated. Generally used when a contract is suspended for late payment or other issues. Moving the Contract back to an Active status will begin creating tasks (based on the schedule) as of the day it was moved back to Active status. Tasks that would have been created during the Hold period will not be created.
-
Closed- Completed: The Contract is completed since there are no more uncompleted scheduled tasks. Completed Contracts can be re-opened. Reopening a Completed Contract will move the Contract into an Open Draft status.
-
Closed-canceled: The Contract has been canceled and will not be completed. Canceled Contracts cannot be re-opened.
-
Review/update the schedule details
-
Open the Schedule Details tab.
-
Type - Select the type of service that will be provided.
a. Task types are created and maintained in Administration > Service and Delivery > Task Types.
-
Route, Quadrant - Select a specific route or quadrant, or select Let Evosus Decide if the system should select the route and quadrant based on the postal code on the customer account.
-
Click ‘OK’ when complete.
a. Routes are created and maintained in Administration > Service and Delivery > General Setup > Routes.
b. Quadrants are created and maintained in Administration > Service and Delivery > General Setup > Quadrant Names, Quadrant Postal Codes.

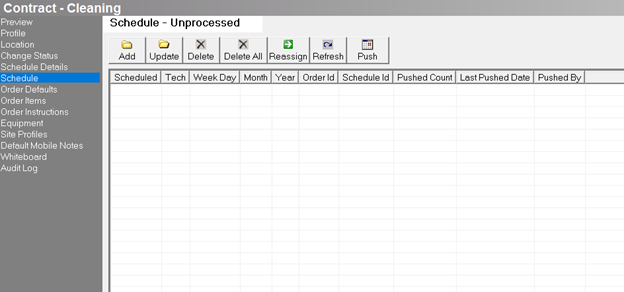
- Create the schedule:
-
Use the Schedule tab to set up when and how often the service is performed. Once you set up a schedule, all of the service tasks populate on this tab based on the schedule. For example, if the service is performed weekly, each weekly task will appear on this tab after you create the schedule.
-
You can create multiple schedules if the schedule changes during the year. For example, this allows you to set up a service that is performed weekly during the summer and monthly during the winter.
-
Review/update the order defaults
-
Sales Tax: Select a sales tax if by default a specific sales tax should be applied to the maintenance contract.
-
See ‘How is a tax code applied to a transaction?’ for information on how the application selected which tax code to apply to a transaction.
-
Sales taxes are created and maintained using the Tax Codes tab on the Accounting Setup screen (Administration > Accounting > General Setup > Tax Codes).
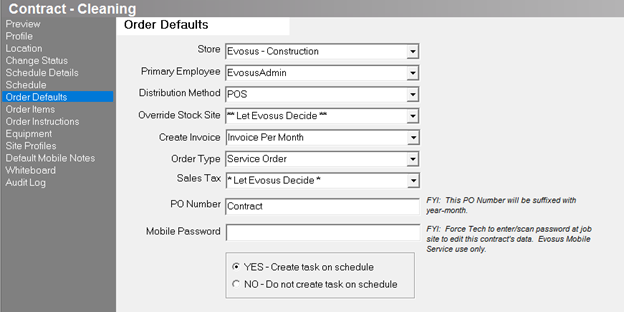
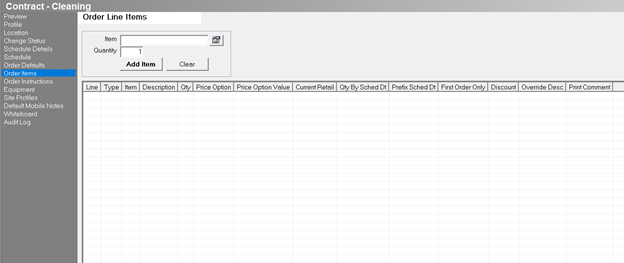
- Add items to the contract
- The inventory items on the Order Items tab are automatically listed on all orders created from the contract. The items give the contract a monetary value. Additional items can be added to individual orders. Click ‘Add’ to add an inventory item to the contract.
- Add equipment to the contract
- The Equipment tab populates with a list of equipment that is set up on the customer's profile. The equipment on this tab is automatically listed on all orders created from the contract. Click ‘Add’ to add equipment to the contract. Equipment added to the contract will also be added to the customer's profile.

Create A New Schedule for the Maintenance Contract
Once you create the schedule, the system will populate all of the service tasks on the Schedule tab.
-
Open the Schedule tab.
-
Click Add. The Schedule Contract screen appears.
-
Range of recurrence - Select when the contract will end.
-
Start: Date the service should begin.
-
No End Date: Check this box if the contract does not expire. The system creates tasks 10 years out in the future.
-
End After: If the contract has a specific number of occurrences, check this box and input the number of times the service will be performed.
- End By: If the contract has a specific end date, check this box and input the end date of the contract.
-
Recurrence pattern - Set up when and how often the service is performed.
-
Daily: Select the Every _ days option if the service should occur every few days. For example, enter 2 if you go to the customer's house every other day. Select the Every weekday option if the service should be performed Monday through Friday.
-
Weekly: Input how often the service should occur in weeks and select what day it should occur. For example, if the service is performed every other Monday, input 2 and select Monday.
-
Monthly: Input how often the service should occur in months, and then select the day it will be performed. The system calculates the date or day based on the Start date selected in the Range of Occurrence section. For example, if the start date is 6/15, which is the second Wednesday of the month, select Date if the service should be performed on the 15th, or select Day if the service should be performed on the second Wednesday.
-
Quarterly: Input how often the service should be performed in quarters, and then select the day it will be performed. Just like the Monthly option, the system calculates the date or day based on the Start date selected in the Range of Occurrence section. For example, if the start date is 6/15, which is the second Wednesday of the month, select Date if the service should be performed on the 15th, or select Day if the service should be performed on the second Wednesday.
-
Schedule for months - Select the service months. This allows you to account for seasonality. For example, if the service is performed once a week during the summer but once a month during the winter, create one schedule for the weekly visits during the summer, and another schedule for the monthly visits during the winter.
-
Tech - select the service tech.
-
Click ‘OK’ when complete.
Related Video Content: