
Creating ICPOs:
-
Enter the ICPO basic information
-
Open the Inter-Company PO screen. There are two ways to open this screen: Administration > Inventory > Inter-Company Purchase Orders > Add Inter-Company Purchase Order OR Administration > Inventory > Inter-Company Purchase Orders > Search Inter-Company Purchase Orders > Click Add New.
-
Requesting Stock Site: Select the stock site requesting the items.
-
Supplying Stock Site: Select the stock site supplying the items.
-
PO Type: PO types are created and maintained using the Search - Inter-Company PO Types screen.
-
Priority: Enter the due date and priority.
-
Select the employees that are notified as the ICPO is processed.
a. When PO is Sent: An action item notification is created for this employee when the PO is sent. This is usually an employee at the supplying stock site.
When PO is Filled: An action item notification is created for this employee when the PO is pulled from the supplying stock site. This is usually the employee that is requesting the transfer.
b. When PO is Received: An action item notification is created for this employee when the PO items are received at the requesting stock site. This normally is the person that pulled the inventory from the supplying stock site or the office employee assigning the task to warehouse personnel.
c. Select No Employee in any of these fields if an action item is not necessary.
-
Requester Follow Up: Create a follow-up action item as a reminder that the ICPO has been initiated.
a. Select No Employee if an action item is not necessary.Click Next.
-
Click Next
-
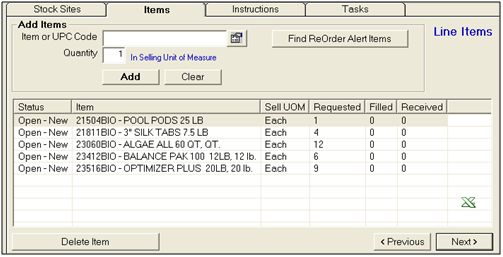
Add inventory items to the ICPO
-
Item or UPC Code - Enter the item code or click
 to select an item from a list.
-
You can also click
 to view the on-hand quantity at each stock site.
-
Quantity - Enter the quantity based on the selling unit of measure.
-
Click Add. The selected item appears in the lower portion of the screen.
-
Verify the quantity is correct for the unit of measure. Click Update Quantity to change the quantity.
-
Add additional items if necessary.
-
Click Next when complete.
-
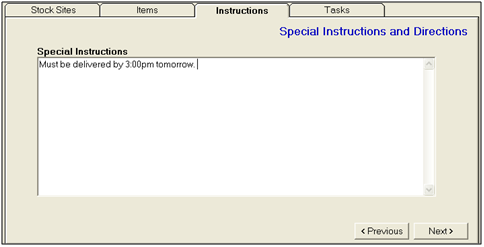
(optional) Enter any special instructions
-
Type in any special instructions for the supplying stock site. This will print out on the ICPO.
-
Click Next.
-
(optional) Schedule service or delivery tasks
-
Add a Service Task if necessary. The Service Task can be used to schedule warehouse personnel to the fulfillment of the order. The task will appear on the service schedule and will print on the employee's daily work schedule.

-
Click Add New Task to schedule the task for the employee. The Schedule screen appears.
-
Create the new task.
-
Click OK when complete to save ICPO.
-
Click Yes to set the ICPO to Sent Status. This will process the first sent action item. You can also click [No] and the ICPO will be saved in an Open-New Status for you to send at a later date.
Create ICPOs using the Stock Site Replenishment Wizard
The Stock Site Replenishment Wizard allows you to create several ICPOs at once for several stock sites based on reorder alerts and insufficient inventory levels.
-
Go to Administration > Inventory > Inter-Company Purchase Order (ICPO) > Stock Site Replenishment Wizard.
-
Check off the Stock Sites you wish to replenish. You may select as many as you like; however, you cannot select the supplying stock site.
- Click Next.
- Select the Supplying Stock Site from the pull-down menu.
- Click Next.
- Select a specific vendor if necessary (Optional).
- Select to find items where the selected Vendor is Primary or Secondary. (Optional)
- Check the box for Reorder Alerts if you want Evosus to find inventory to replenish based on pre-set reorder alerts at the requesting stock site(s).
- Check the Insufficient Inventory box if you want Evosus to check for inventory reserved on orders where there is not enough quantity on hand to cover the order. You may check one or both of these options.
- Check the "Only Request Items in Stock at Supplier" if you want Evosus to ignore items where the supplying stock site does not have enough on hand to cover the need at the requesting stock sites.
- Click Next.
- Check off the Product Lines you're interested in. Evosus will only search items in the selected Product Lines.
- Click Next.
- Select the PO Type from the pull-down menu.
- Check the "Print Fill Slips when Complete" box if you want Evosus to automatically print Fill Slips for all ICPOs that were created.
- Click Create.
- ICPOs created through the wizard will automatically be changed to "Sent" status. Go to Administration>Inventory>Purchase Orders>Inter-Company Purchase Orders>Search Inter-Company Purchase Orders to edit the ICPOs.