
-
Perform cash-and-carry type transactions using Evosus as your cash register.
-
Easy look-up features for customer account history and previous purchases shorten the time needed to process your transactions.
-
Sales transactions performed through POS will automatically remove items from inventory and deliver the items on the customer's order.
-
All transactions require an employee login and password to proceed.
Enter a Sales Transaction - POS
-
Log into POS.
-
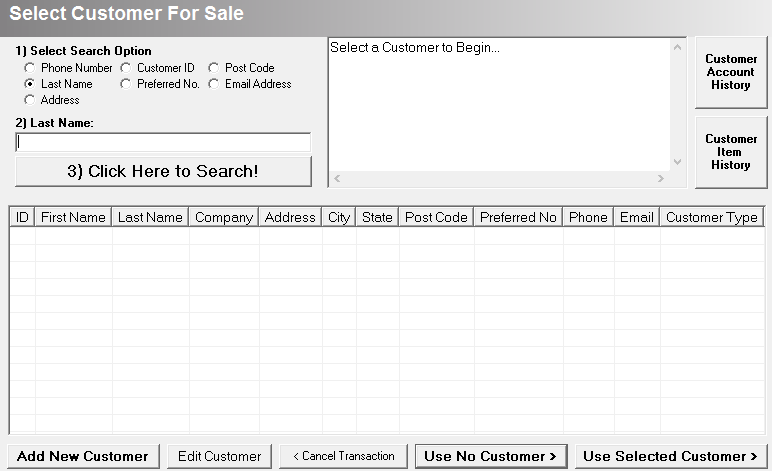
Click Sale. The Select Customer For Sale screen appears.
-
The Sale button is the default option. This means you can press ENTER instead of clicking on it.
-
Select a customer or locate an existing customer.
-
Selecting an existing customer allows you to track all purchases and payments made by that customer.
-
Inactive customers are displayed in blue text in the grid - INACTIVE appears in the Active column.
Don't want to select a customer? - Click Use No Customer to enter a transaction that is not associated with a customer record. We recommend creating a new customer instead of using this option so you can gather customer information. This allows for more effective marketing and customer service.
-
(optional) Verify the customer information:
-
Click Update to change the existing address, or click Add to add another address.
a. You can use the Point Of Sale tab on the System Parameters screen to set up how often the Verify Customer Address screen appears.

-
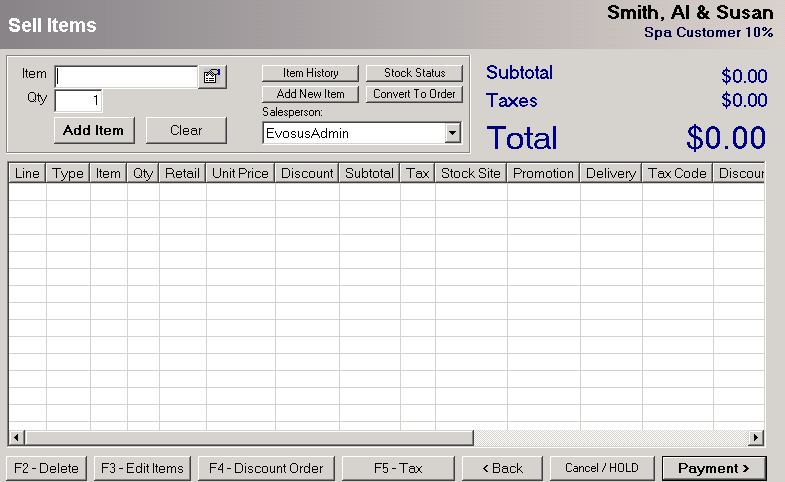
Scan the items.
-
If you cannot scan the items, do any of the following:
a. Manually locate the item - Click  to manually search for an inventory item using the inventory tree.
b. Use a part number or description - Type the part number or description in the Item field and click Add Item to search for a partial item code.
c. Select an item using the customer history - Click Item History to view the delivered items, on order items, transactions, and water tests. Double click an item to select it, and then click Add Item. This is useful if the customer needs an item they have purchased before but cannot remember the part number.
d. To remove an item, highlight the item and press F2, or click Delete. The deleted item still displays on the screen, but it appears in red.
e. Use the Print Voided Items on Receipt option on the Point Of Sale tab on the System Parameters screen to define if voided items should display on the receipt.
-
(optional) Edit the items:
-
1. Double click on an item to edit it. For example, double click on an item to change the quantity or unit price of an item. The Line Item Editor screen appears.

-
Quantity - If a customer is purchasing more than one of the same item with a barcode, scan each item once or scan one of the items multiple times until the correct quantity is displayed on the screen.
-
Warranty Item - Check the box to mark the specific item as warranty or click Warranty All Items to warranty every item on the order. Marking the item as warranty changes the price of the item on the order to $0.00 and automatically creates a Return Goods Authorization.
-
Item Description - Only enabled if the item is set up to allow employees to change the description (Open an inventory item > Options tab > Users cannot change item description on sales box).
-
Discount - Enter an individual item discount by percent or dollar amount, and then select a Discount Reason. To apply a discount to every item on the receipt, Use the Discount Order button on the Sell Items screen.
-
Comment - Enter a comment or additional information on the line item. Comments do not print on POS receipts.
-
Unit Price - Override the unit price if you have the incorrect price of an item in the system and need to change it from within the transaction. Otherwise, you will just discount the item. Changing the unit price from within an order will not permanently change the price of the item. The price change only applies to that order. You must have proper security permissions.
-
Print Item on Quote/Order - Items always print on POS receipts.
-
Sales Tax - If this particular item (such as labor) has a different sales tax than the rest of the items on the order, you can change the sales tax here. You must have proper security permissions.
-
Stock Site - You may change the stock site this item will be pulled from by selecting a different stock site from the pull-down menu. You must have proper security permissions.
-
Salesperson - Select the employee that sold the item.
-
(optional) Discount the entire order:
-
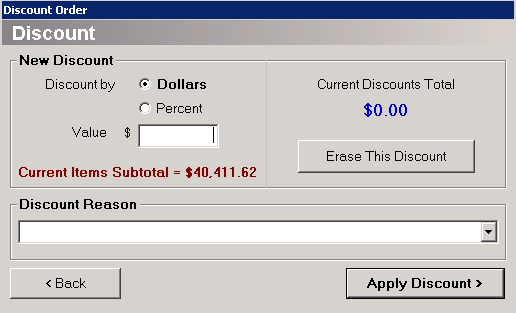
Click Discount Order or press F4 to discount the entire transaction. The Discount screen appears.
-
Enter dollars or percent and the amount you are discounting.
-
Enter the discount amount.
-
Select a discount reason.
-
Click Apply Discount.
a. Click Erase this Discount to delete the discount.
-
(optional) Change the tax on the entire order:
-
1. Click Tax, or press F5. The Tax Exempt Information screen appears.
-
2. Select a tax in the Set Tax Code To field.
-
3. (optional) Enter the tax-exempt reason - for example, input the driver's license number.
a. Tax-exempt reasons appear on the Sales Tax Exempt Log.
-
4. Click Save.
-
Click Payment:
-
Click Payment to complete the transaction.
-
Click Cancel/HOLD to cancel or hold the entire transaction. If you put a transaction on hold, you can reopen it using the On Hold Trxs button on the main POS screen.
-
Convert to Order - Convert the POS transaction into an Open Sales Order. This is useful if the customer is also purchasing items you do not have in stock or special order items.
-
(optional) Assign serial numbers: The Serial Numbers screen appears if you are selling a serial numbered item.
-
1. Order Item - Select an item on the order with a serial number.
-
2. Serial Number - Select the associated serial number.
-
3. Click Assign. You can also use the Add New Serial Number to create a serial number on the fly.
a. This is not recommended. It is better to record the serial number as it is received through Purchase Orders, but you might have to use the Add New Serial Number button if the serial number was not recorded in the application.
-
4. Click Next when complete.
-
Complete the transaction:
-
Enter the payment amounts. Checks require you to enter the check number.
a. You can enter an amount in more than one field if this is a split payment - for example, the customer is paying in cash and credit card.
b. Warehouse Order- Check this box if the customer is picking up the items from the warehouse or a different store.
c. Bill the customer at a later date- Check the Bill Customer At a Later Date box and confirm the billing address. Once the transaction is complete, an invoice is created and the purchased items have a status of Delivered.
- This feature is only enabled when the Can Bill Me Later in POS box is checked on the Options tab of the Customer screen (Customer > Open a customer > Options tab). On the customer record, you also define the POS credit limit.
- This feature also has to be enabled at the system level using the Point Of Sale tab on the System Parameters screen (Administration > System > Evosus Defaults > System Parameters).

What kind of receipt is generated? The generated receipt can be the standard receipt or an 8.5" X 11" full sheet receipt with multiple copies. This is set up using the Point Of Sale tab on the System Parameters screen (Administration > - System > Evosus Defaults > System Parameters).
What if the customer exceeds the POS credit limit? - The POS credit limit set up on the customer account applies to the current PO transaction, and to the outstanding balance on the account. If the customer has exceeded the credit limit, a message appears and you cannot complete the transaction. For example, if a customer has a POS credit limit of $1,000 and is making a purchase of $20, but the customer has an outstanding balance of $1,200, a message will appear and you cannot complete the transaction.
-
Click Finish to complete the transaction.
-
The receipt prints based on the selection on the Point Of Sale tab of the System Parameters screen (Administration > System > Evosus Defaults > System Parameters > Receipt Prints To field).
-
The cash drawer opens and the POS login screen appears.
-
Need to reprint the receipt? You can use the Reprint Receipt button on the POS Transactions Today screen to reprint a receipt on a completed transaction.
(Evosus Card Services) Process credit card transaction:
The Process Credit Card screen appears if you use Evosus Card Services. Use this screen to process the credit card transaction.
-
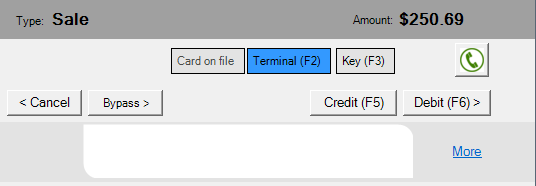
In POS, select the items, enter the credit card payment amount, and click Finish. The Process Card screen appears.
-
Card on file, Terminal, and Key - Select how you want to enter the credit card information. For example, select Terminal to use a credit card terminal to read the credit card information.
-
The default value of this field is set up using the Default Card Entry field on the Cash Drawer screen (Administration > System > Stores > Cash Drawers > Open a cash drawer).
-
Select Card on file is only available if the selected customer has a card on file.
-
Select Key to manually enter the credit card information. This is covered in more detail later in this process.
-
Click Credit to process the transaction as a credit card, or click Debit to process the transaction as a debit card.
-
Transaction in Progress...Please Wait appears in the Use Pin Pad screen.
-
The customer follows the directions on the card reader
-
An approval message appears on the card reader and in POS, and the receipts are printed. The transaction is complete.
What if the credit card is declined and you have to cancel the transaction? - Click Cancel on the Process Credit Card screen and then click Cancel/Hold on the Payment screen to cancel the transaction.
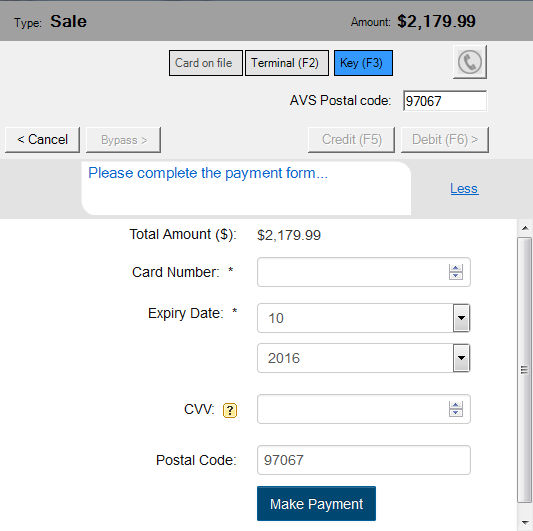
What if the card reader will not read the card? - Click Key, or press F3 on the Process Credit Card screen to manually key in the credit card information. Enter the customer's zip code in the AVS Postal Code field and then click Credit. You cannot manually key in a debit card transaction. Enter the credit card information and then click Make Payment.
Is your internet down? Process an off-line/force authorization transaction:
-
You are instructed to ‘Call Issuer’ in the response of a transaction
-
Your internet connection is down, so processing a normal transaction is impossible.
An off-line/force authorization transaction is a transaction where you use a phone to verify the credit card information and authorize the transaction.
-
You then enter the authorization number into POS and complete the transaction.
-
You need to process an off-line/force authorization transaction if either of the following is true:
Follow these steps to process an off-line/force authorization transaction:
-
In POS > select the items > enter the credit card payment amount > click Finish. The Process Credit Card screen appears.
-
Click on the
 icon. The authorization phone number, Bank ID/Bank Number, and Phone Authorization Merchant ID number are displayed in the screen. You need this information to process the off-line/force authorization transaction.
-
This screen also includes detailed steps on processing an off-line/force authorization transaction.
-
The Bank ID/Bank Number and Phone Authorization Merchant ID number is set up on merchant profile.
-
Call the phone authorization number and get the authorization number. You need to write down this number.
-
Enter the authorization number in the Auth Code field on the Process Credit Card screen.
-
Complete the transaction.
-
If your internet connection is down - Click Bypass to complete the transaction.
-
If your internet is working - Click Force to complete the transaction.
Bypass Button
Click the Bypass button to process the credit card payment offline and/or approve a credit card without electronically processing that card right away.
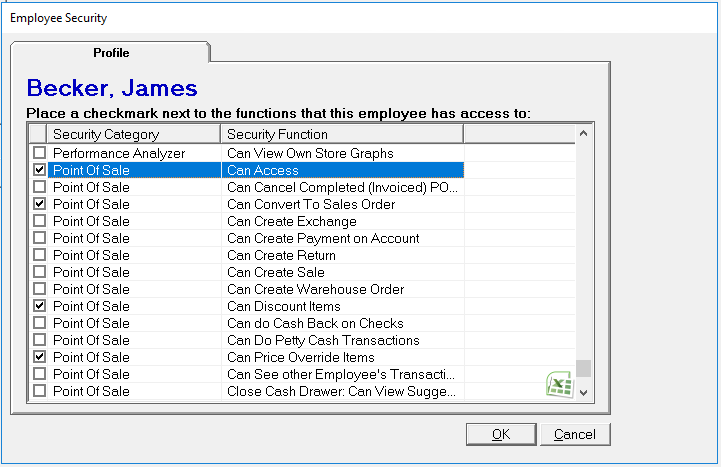
Security Permissions Required
Proper permissions must be set before an employee is able to perform this action. To give an employee permissions go to Administration > System > Security > Security - Employee Level Permissions > Double click to select Employee > Check the box of the permission you would like to grant them access to.
Implications
-
POS Sales transactions go through the same process as Sales and Service Orders; it is just done behind the scenes.
-
Inventory is automatically delivered, statuses are changed and payments are required to finish the transaction.
-
Once a transaction is finished it will appear in the Customer Profile in the same format as a Sales Order or Service Order.
Related Reports
-
Cash Drawer Activity (Administration > Reports > Accounting > Banking > Cash Drawer Activity Report) - Detailed view of customer payments made for a specific date range.
-
Overall Performance (Administration > Reports > Operations > Overall Performance) - Multiple criteria displayed based on Company, Store, or Employee(s) for a given date range. Gives you the big picture of what's happening with your business in a given time frame.
-
Line Item Commission Register (Administration > Reports > Sales > Commissions > Line Item Commission Register) - Analyze Point of Sales Commissions. Looks at each line item sold within the specified date range that has a commissionable employee associated with it.
Related Video Content: