
There are two versions of Evosus Mobile Services:
-
Evosus Mobile Services version 4.X - This version is only compatible with Evosus version 6.6.408 and above.
-
Evosus Mobile Services version 3.X - This version is compatible with Evosus version 6.4.28 and above. That means it's also compatible with the most recent version of Evosus. For example, if you upgrade to the latest release, you don't have to upgrade to Evosus Mobile Services version 4.
Site Profiles
A site profile represents a tangible feature at a customer’s location- for example, a pool, Spa, Water Feature, Stove or Fireplace. The purpose of recording a site profile is to track equipment and/or site details, including specific readings per service visit. This must be configured before using Evosus Mobile Service.
Site Profile Attributes
Site Profile Attributes are characteristics of the Site Profile that are static or do not change, such as the volume of a pool. Once the Attributes are defined, you can create lists of default values to use when setting the attributes.
For example, a Site Attribute might be Pool Type and the default values could be Gunite, Vinyl Liner, Fiberglass and Above ground. Users can select from the default value list when entering Site Profiles for each customer.
Site Profile Per Visit Attributes
Per Visit Attributes are elements of the Site Profile that may change each time a tech performs a service and are often measurable values, such as chemical readings or equipment condition. Each Per Visit Attribute has a measurement and adjustment per visit. The measurement would be the value before service and the adjustment could be the actual adjustment value OR what value you adjusted to.
Per Visit Measurement and Adjustment Defaults
Each Per Visit Attribute has a measurement and adjustment per visit. The measurement would be the value before service and the adjustment could be the actual adjustment value OR what value you adjusted to. For example, if the attribute is Temperature, the tech would enter the measurement as the temperature of the pool when they arrived, such as 82 degrees.
The adjustment could be one of the following:
-
The number of degrees they decreased or increased the pool temperature at the time of service, such as -2 degrees.
-
The temperature when the service tech left the site, such as 82 degrees. In other words, what the temperature was adjusted to rather than the number of degrees by which it was adjusted.
When entering Measurement and Adjustment Defaults, there are two options for entering data: Force Number Entry or Allow Text Entry.
- Force Number Entry:
b. The Increment By value is the default increment by which the range will increase from the default value. For example, if the Visit Attribute is Chlorine, the Low (Minimum) value would be 0.0, the High (Maximum) value could be 15.0, the Default value could be 2.5 and the Increment By value could be 0.1. When entering data into the Chlorine field, techs will see a list of values that increment by 0.1, starting at 0 PPM up to 15 PPM.
- Allow Text Entry:
a. Select “Allow Text Entry” if the Default Values should be text rather than numerical entries. Examples of default text values could include equipment condition, such as OK, Bad, Repair and Replace. Text values should be abbreviated to no more than 10 characters as there are character limitations in the Mobile Service app.
Mobile Service/Delivery Prompts
Mobile Service Prompts are information you want to collect when performing a service or delivery call, such as chemical readings or equipment condition. Each Mobile Service Prompt has a Measurement and Adjustment per visit. The Measurement would be the value before service and the Adjustment could be the actual adjustment value OR what value you adjusted to.
Mobile Prompts Measurement and Adjustment Defaults
Similar to Per Visit Attributes, each Mobile Service Prompt has a Measurement and Adjustment value per visit.
Mobile Service and Delivery Prompts
Mobile Service/Delivery Prompts are meant to be used as a checklist for the tech to use when performing a service repair. Mobile Service/Delivery Prompts can be setup for specific types of service, deliveries, repairs or equipment type, but this is up to you and how you want the prompts to work. Examples could include Spa Delivery, Heater Repair or Stove Install.
You then create specific prompts, or questions, that techs must fill out when completing the selected type of work.
- Mobile Service Prompts do not print on the customer's invoice nor do they appear in Mobile Notes or in the Site Visits screen in the Customer Profile. Mobile Service Prompts will display in the Customer Notes section of the Customer profile.
Quick Items
This feature only applies to Evosus Mobile Services version 4.0 and above.
Quick items are inventory items that a tech can quickly add to a job. For example, quick items could be items that your techs keep in their trucks and frequently add to an order. Setting these items up as quick items can save your techs time in the field.
"On my way!", "I've arrived!", and Depart messages
This feature only applies to Evosus Mobile Services version 4.0 and above.
If the customer has an email associated with their customer record, the tech can email the customer when they're on their way, and again when they have arrived at the job. The standard text of these emails is set up on the Mobile Dashboard and can be modified when the tech emails the message from their device.
-
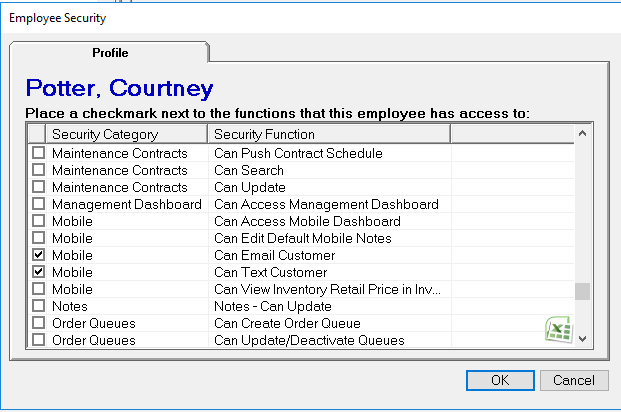
Your tech will not see the Email and Text options from within Mobile unless permissions are set for that particular tech.
-
To set Email and Text permissions go to Administration > System > Security > Security - Employee Level Permissions > double-click to select tech > Scroll to Mobile and check "Can Email Customer, Can Text Customer.
-
The Depart feature was added in Evosus version 6.6.500, and Evosus Mobile Services version 4.0.32.
-
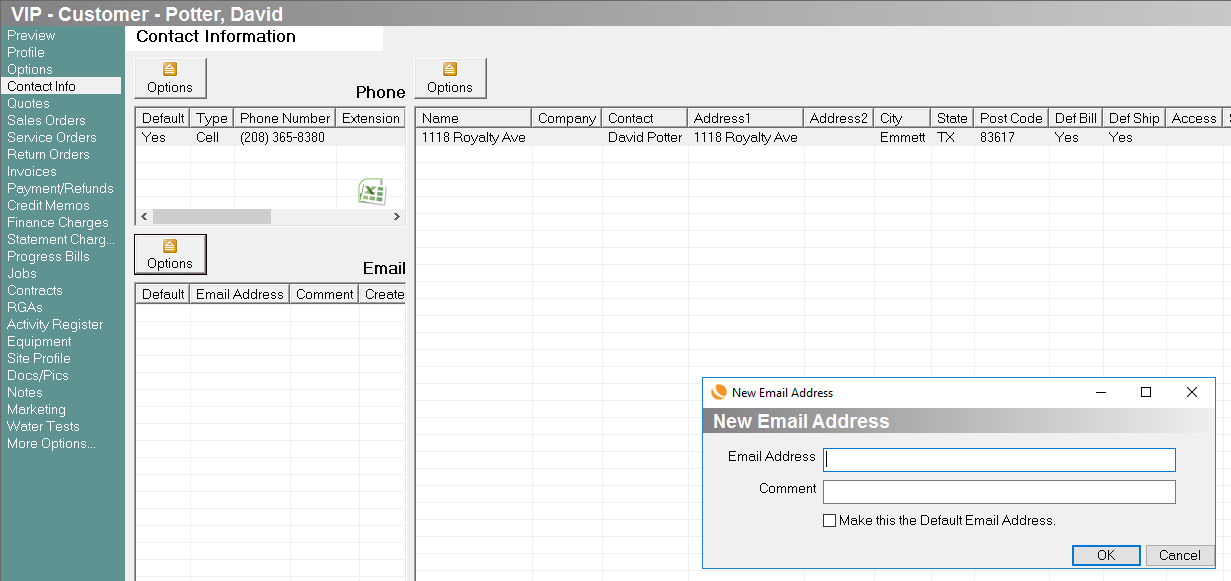
To send one of these messages using Evosus Mobile Services version 4.0 or greater, click on a scheduled task, and then click the On My Way or Arrived button at the bottom of the Job Location screen. These buttons are only available if the customer has an email set up on their customer record (Customer tab > Open a customer > Contact Info tab > Email section > Click Options and then add Customer Email)
Evosus Mobile Services - Setup
-
Log into Evosus
-
Select Help > About.
-
The version number appears at the top of the screen.

Click here for information about upgrading to the latest release.
Step 2: Complete the System Parameters in Evosus
There are several system parameters in the application. To access these parameters go to Administration > System > Evosus Defaults > System Parameters > Open the Mobile tab.

Deliver Items During Sync
-
Set this parameter to Yes if when the mobile device syncs and sends items to be added to service and sales orders, those items are marked as Delivered. For example, if you add an item to an order using Evosus Mobile Services, the status of the item will be "Closed - Delivered" when the device is synced with Evosus Business Management Software.
-
This system parameter does not apply to items added to an order in Evosus. It only applies to items added to the order in Evosus Mobile Services.
-
If you set this parameter to No, the item is added to the order but it is left in a "Waiting Delivery" status.
Transfer Pictures over WIFI only
Select Yes if pictures should only be transferred when the device is using WIFI instead of data. There is also a Send pictures over WiFi only option on the Setup tab of Evosus Mobile Services.
Sync Customer ID to Mobile Devices
Select Yes if the customer ID should be synced to mobile devices. This means the Customer ID field appears on Evosus Mobile Services.

Include blackout dates on Evosus Mobile schedule
Select Yes if blackout dates should be included on the service schedule that appears in Evosus Mobile.
Step 3: Set up Site Profiles
- In Evosus, go to Administration > Mobile > General Setup > Site Profile Setup.
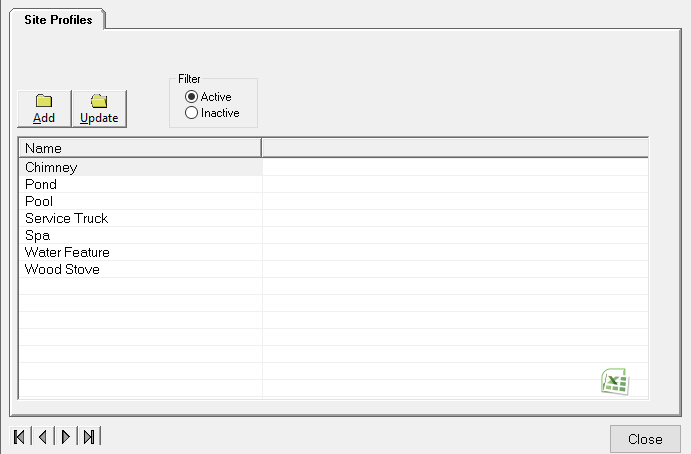
-
Click Add.
-
Enter a Site Profile Name, such as Pool or Stove.
-
Click OK to save.
- You can also copy an existing site profile. If you are creating multiple, but similar, site profiles, then use this feature to default setup across all the site profiles. You can then edit each profile as needed.
Setup Site Profile Attributes
- Go to the Profile Attributes menu of the Site Profile setup (double-click a Site Profile).
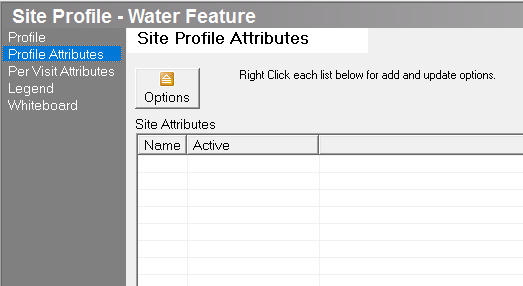
-
Right-click in the white grid beneath the Site Attributes section and click Add.
-
Enter the name(s) or titles of the attributes you want to make available to the user when adding a site profile. Remember that Attribute Names are static and cannot be updated when you are within a customer’s site profile.
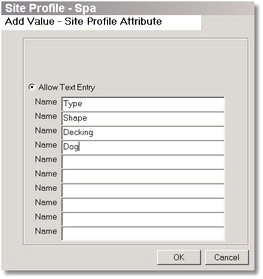
Add Site Profile Attribute Default Values
-
Highlight a Site Profile Attribute on the left-hand side of the screen.
-
Right-click in the white grid below Site Attributes Default Values and click Add. Make sure the correct Site Attribute Name appears above this section.
-
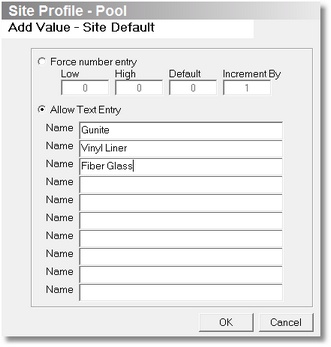
There are two options for entering data: Force Number Entry or Allow Text Entry.
Force Number Entry - Select this option if the Default Values should be a range of values. You must enter a Low (Minimum), High (Maximum), Default value and an Increment By value.
-
The Increment By value is the default increment by which the range will increase from the default value. For example, if my site Profile Attribute is Volume I might enter “0” for the Low, “50,000” for the High
-
“15,000” for the default, and “1,000” for the Increment By. When setting up the customer’s site profile, the user can right-click in the Volume value field and select the Volume value from a list that increments by 1,000 starting at 0 gallons up to 50,000 gallons.
Allow Text Entry - Select “Allow Text Entry” if the Default Values should be text rather than numerical entries.
-
Examples of default text values could include pool surface type or fuel type. For instance, Pool Surface value options could include Gunite, Vinyl Liner, Fiberglass and Pebble.
-
Fuel Type options could include Pellet, Wood, and Gas. You may enter as many text values as necessary.
Setup Site Profile Per Visit Attributes
- Go to the Per Visit Attributes menu of the Site Profile setup.

-
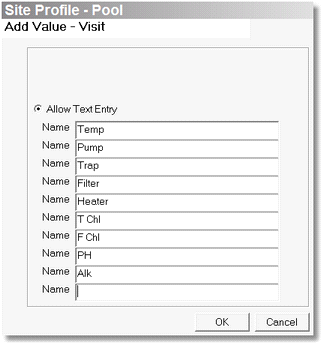
Right-click in the white grid beneath the Visit Attributes section and click Add.
-
Enter the name(s) or titles of the Per Visit Attributes you want techs to record while onsite. Remember that Per Visit Attribute Names are static and cannot be updated from the customer profile or Evosus Mobile Service.
- Per Visit Attribute Names should be limited to no more than 10 characters as there are character limitations in the Mobile Service app.
Add Per Visit Measurement and Adjustment Defaults
-
On the Per Visit Attributes menu of the Site Profile setup, highlight a Per Visit Attribute on the left-hand side of the screen.
-
Right-click in the white grid beneath the Measurement Defaults section and click Add.
-
Select either Force Number Entry or Allow Text Entry and key in the appropriate Measurement values.

Enter the adjustment values for each Per Visit Attribute.
Determine how you want adjustment values to work - either reflect the actual adjustment value OR the value that was adjusted to. You should keep the method consistent for all adjustment values.
-
On the Per Visit Attributes menu of the Site Profile setup, highlight a Per Visit Attribute on the left-hand side of the screen.
-
Right-click in the white grid beneath the Adjustment Defaults section and click Add.
-
Select either Force Number Entry or Allow Text Entry and key in the appropriate Adjustment values.

Setup Site Profile Legend
The Legend is a text field to define abbreviations that you have used on Site Profiles Visit. The legend will print on customer documents so that the customer can refer to it when reading their Per Visit information. The legend is Quick Text enabled.

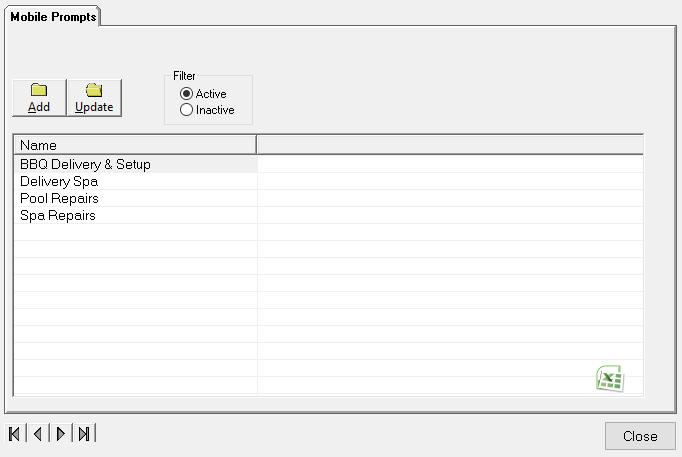
- In Evosus, go to Administration > Mobile > General Setup > Mobile Service/Delivery Prompts.
-
Click Add.
-
Enter a Mobile Prompt Name, such as Stove Delivery or Heater Repair.
-
Click OK to save.
- You may also copy an existing Mobile Service/Delivery Prompt if some exist. If you are creating multiple, but similar, prompts, then use this feature to default setup across all the Mobile Service/Delivery Prompts. You can then edit each type as needed.
Setup Mobile Service/Delivery Prompts
- Go to the Prompts menu of the Mobile Service Prompts Profile setup (double-click a Mobile prompt).
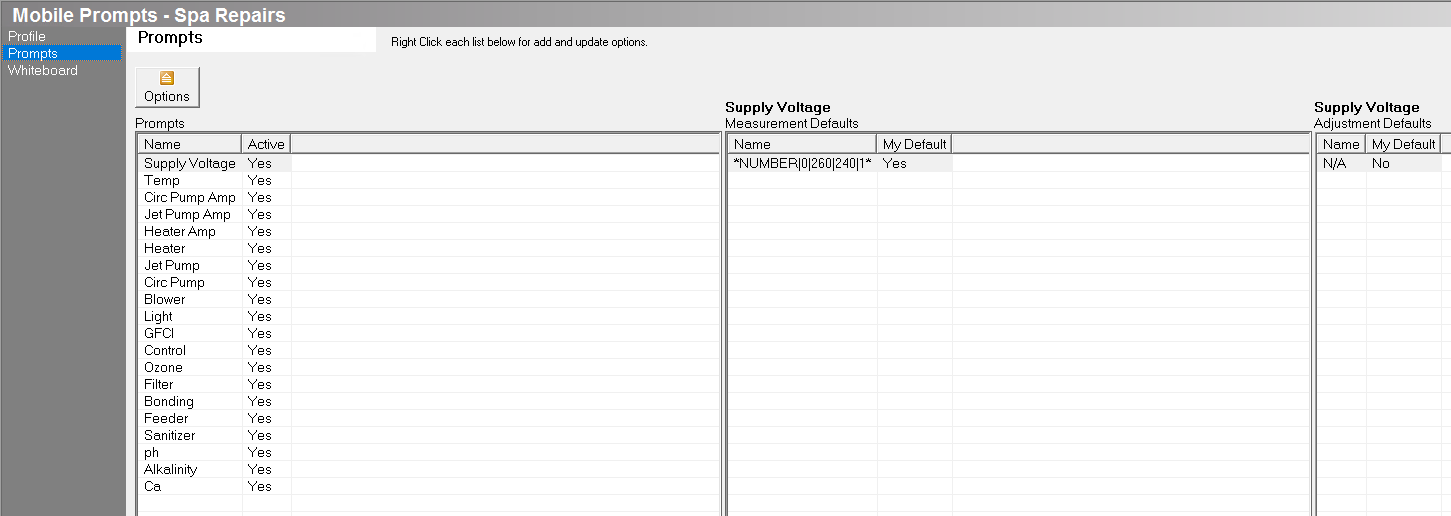
-
Right-click in the white grid beneath the Prompts section and click Add.
-
Enter the name(s) or titles of the Mobile Prompts you want techs to record while onsite.
- Mobile Prompt Names should be limited to no more than 10 characters as there are character limitations in the Mobile Service app.

Add Mobile Prompts Measurement and Adjustment Defaults
-
On the Prompts menu of the Mobile Service/Delivery Prompts setup, highlight a Prompt on the left-hand side of the screen.
-
Right-click in the white grid beneath the Measurement Defaults section and click Add.
-
Select either Force Number Entry or Allow Text Entry and key in the appropriate Measurement values.
-
On the Prompts menu of the Mobile Service/Delivery setup, highlight a Prompt on the left-hand side of the screen.
-
Right-click in the white grid beneath the Adjustment Defaults section and click Add.
-
Select either Force Number Entry or Allow Text Entry and key in the appropriate Adjustment values.
Step 5: Set up quick items
- In Evosus, open the Mobile Dashboard (Administration > Mobile > Mobile Dashboard).
- Open the Quick Items tab.
-
Click Add, and then select the inventory item.
-
To add quick items to an order, open Evosus Mobile Services version 4.0 or later, arrive at a job and then click Edit > Add Item to Order > Quick Items.
Step 6: Set up your "On my way!", "I've arrived!", and Depart messages
- In Evosus, open the Mobile Dashboard (Administration > Mobile > Mobile Dashboard).
- Open the Arrive/Depart Message tab.
- On My Way - Standard message a tech can send when they're on their way to the location. For example, "We're on our way to your location."
-
Arrived - Standard message a tech can send when they arrive at the location. For example, "We're here!"
-
Depart - Standard message a tech can send when they depart from a location.
Step 7: Set up all of the devices
To follow these steps, you must be using Evosus Business Management Software version 6.6.1XX or greater.
- Install Evosus Mobile Services
There are two versions of Evosus Mobile Services, and the Evosus version that you're running determines which version of Evosus Mobile Services you can use.
| Evosus version 6.4.28 and above | Evosus version 6.6.408 and above |
| Android | Android |
| Apple | Apple |
- Get your five letter code
-
On the device tap on the 3 horizontal lines in the upper left-hand corner > Tap on Account > This will bring you to the Account screen.
-
Find the five letter code at the bottom of the screen. For example, RKVVF.
- Input your five letter code into the Mobile Dashboard
-
Select the employee that is using the device in the Employee field.
-
Upload Pics over WiFi only: Check this box if the device should only upload pictures when connected to WiFi.
In Evosus, go to Administration > Mobile > Mobile Dashboard > Licensing > Enter the five letter code into the Setup Code field.
- Click "Push Setup to Device."
- Setup information is loaded onto the device
- An information message appears on the mobile device, and the serial number and configuration information is loaded.