
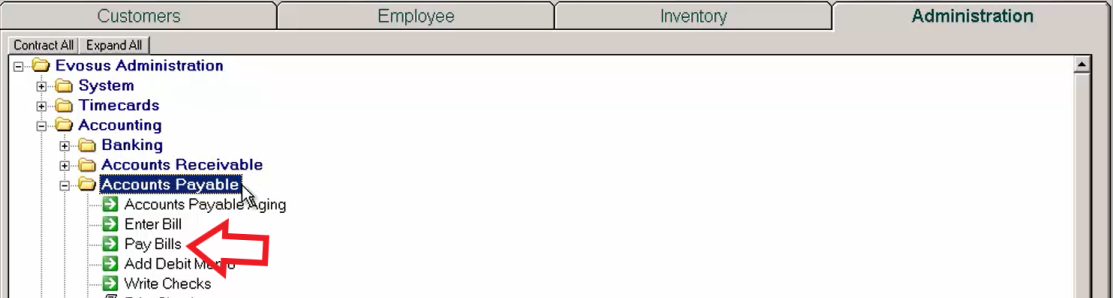
When you’re ready to pay outstanding invoices, you will go to Pay Bills under Administration>Accounting>Accounts Payable>Pay Bills
- Open the Pay Bills screen
2. Select the invoices to pay.
-
If you select invoices for different vendors: If you select invoices from multiple vendors, the system will create a check for each vendor.
-
If you select multiple invoices for a single vendor: All of the invoices are paid with a single check. If you need to print a separate check for each invoice, select one invoice and complete the process, and then repeat the process for each invoice.
-
Double click on an invoice to view detailed invoice information.
-
Click on a column heading to sort the bills by that column. For example, click on the Vendor column heading to sort the bills by vendor name in ascending or descending order.
-
To Pay: As you select invoices, the To Pay field at the bottom of the screen displays the total amount of the selected invoices. This amount includes discounts and credits.
If you need to update or review one of the invoices, simply double click and the invoice will open.
3. Apply discounts.
Some vendors will provide you with Payment Terms that offer a discount if the balance is paid before the due date. If the Payment Terms you selected when entering the invoice included a discount date, then the Discount Date column will be populated with the date you need to pay by in order to receive the discount. If you choose to pay the bill on or before the discount date shown, Evosus will automatically place the discount amount into the Discount Used column and update the Amount To Pay. You can override the discount amount as needed.
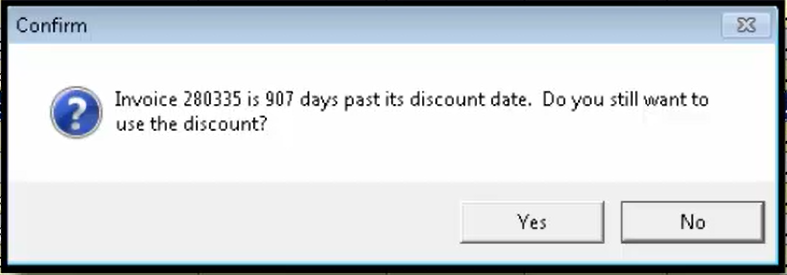
If you choose to pay a bill and the discount date has passed, you will receive an alert notifying you the discount date has passed and asking if you’d still like to use the discount. See example screenshot below.
Discount Used: The system automatically calculates the discount amount if you are paying the invoice before the Discount Date.
-
To manually enter a discount amount, enter the discount in the Discount Used field.
-
The system uses the payment method and the invoice date to calculate the Discount Date.

4. Apply credits.
Depending on what invoice you have highlighted in the grid Evosus will display any credits available for that vendor. There are two ways to apply vendor credit to an invoice. You can manually type in the amount of credit you wish to use in the Credits column of the grid. When applying credits to an invoice this way Evosus will apply credits from oldest to newest.
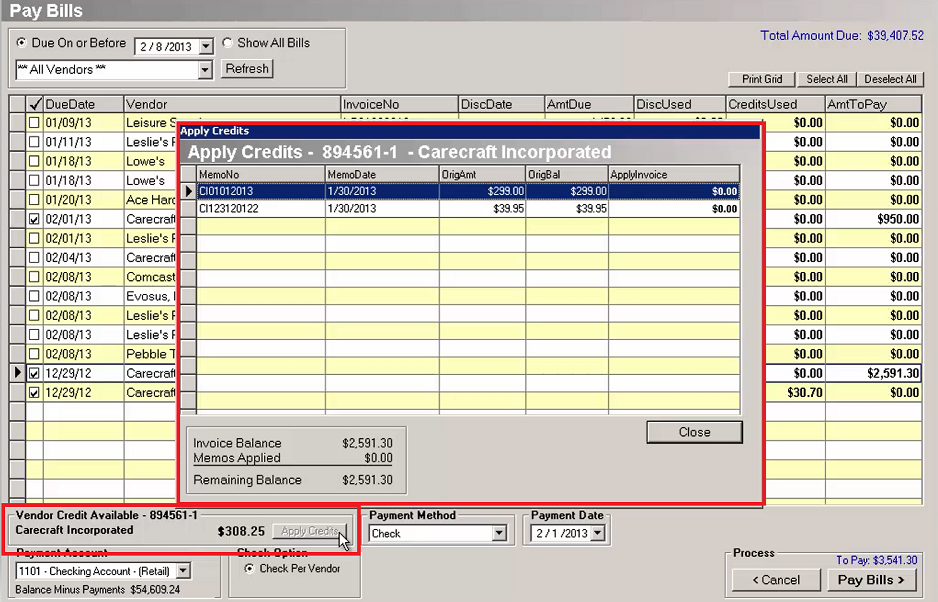
The other option is to apply individual credits to each invoice by highlighting the invoice and clicking “Apply Credit”. This allows you to review each available credit on the vendors account and choose how much you’d like to use of each credit. When you click Close, Evosus enters the credit amount into the Credit column of the grid, which will also update the Amount to Pay.
-
Credits Used - Highlight an invoice and the Vendor Credit Available section displays the credits available at the selected vendor.
-
Input the credit amount in the Credits Used field. Evosus - Manually apply a credit applies credits from oldest to newest and you manually apply a credit to use.
-
Highlight an invoice and click Apply Credits in the lower left corner. The Apply Credits screen appears, which displays all of the credits on the vendor account, and lets you select which credits you want to apply to the selected invoice. See example screenshot below. This shows we have two credits on file for Carecraft that can be used to pay the selected invoice #894561-1 - Automatically apply a credit.
5. (optional) Manually change the amount to pay.
-
Manually enter the amount to pay in the Amount To Pay column. This amount automatically decreases as you add discounts/credits.
6. Payment Method: Select the payment method.
-
Payment methods are created and maintained using the Pay Methods tab on the Accounting Setup screen (Administration > Accounting > General Setup > Payment Methods).
7. Payment Account: Select the payment bank account. This bank account is credited when the invoices are paid.
8. Payment Date: Defaults to the current date, but you can select a different date if needed.
-
This is the date that appears on the check, and the date the payment posts to the general ledger.
9. Click Pay Bills when complete. The Confirm Bills to Pay screen appears, which displays a summary of the selected invoices.
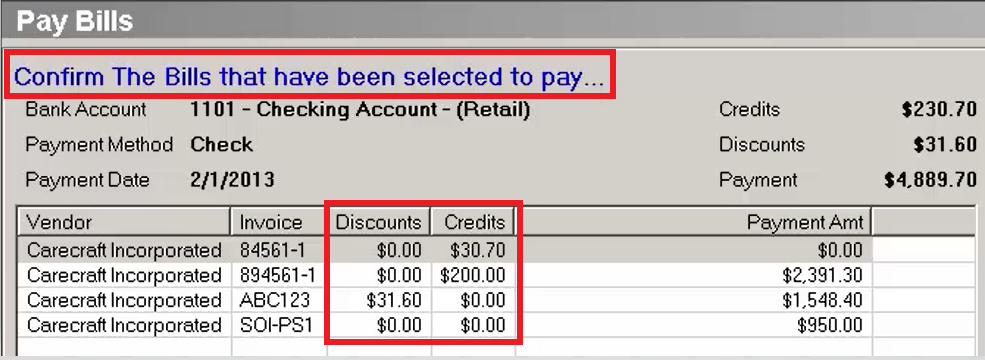
10. Verify the information is correct.
11. Click Confirm.
-
The accounts payable account is debited, and the selected bank account is credited.
12. Optional: Go to Print Checks (Administration > Accounting > Banking > Print Checks) to print the checks.
If your payment method was Check, Evosus placed the check in the Print Checks queue. The Print Checks queue allows you to view and print checks that have been sent to the queue from Write Checks or Pay Bills. You can choose to print the checks or remove them from the list if you do not intend to print them.
-
To view a list of all payments made for a specific point in time, go to Administration>Accounting>Accounts Payable>Search Vendor Payments.

Security Permissions Required
|
Category |
Function |
|
Admin-Accounting |
*Can Access Accounting Tree Branch |
|
AP - Pay Bills |
Accounting Implications
|
Transaction Status |
Debit |
Credit |
|
Pay Bills |
Accounts Payable |
Checking Account |
Related Reports
-
Accounts Payable Invoice Register (Administration>Reports>Accounting>Accounts Payable>Accounts Payable Invoice Register): View all AP invoices for a selected time period.
-
Cash Requirements (Administration>Reports>Accounting>Accounts Payable>Cash Requirements): Detailed or Summary list of AP Invoices that are coming due and the cash required to pay them.