
Marketing List is a list of database records – specifically names and contact information. It might be Customers, it might be Leads, it might be Customers excluding or including given demographic or sales characteristics. It might be related to pre-sale or post-sale Campaign Streams. The list can be manifested as an Excel document, a printout of labels, or to populate a Campaign Stream as described in a separate article. All marketing lists created in Evosus are saved for possible reuse. If reusing a list, skip steps 1 and 2 of the ‘Process to Complete’ section below.
Marketing List generation:
-
Outline Filters Desired Filtering is what we’re going to call the slicing and dicing of your demographics list in order to target the right people to the right Campaign Stream. Filters can include or exclude different demographic or Sales characteristics such as gender, interest, postcodes, salesperson, or item ordered. Although they are added one at a time, there can be multiple filters applied within a list to get specific if desired.
-
Create a New Marketing List
a. Go to Administration > Marketing > List Generation > Marketing Lists
b. Click 'Add'.
c. Name: choose something descriptive like “Interest – Purchase status” such as “Spas - Non-Purchasers”.
d. Category: This field is used to filter the list of Marketing Lists if selecting for reuse. It’s helpful to use a department or employee’s name such as Sales, Service, or Bob. Select an existing category from the drop-down, or type a new one directly in the field itself.
e. Create List Based On:
-
Filter options shown on the following screen will vary based on which radio button you select here. For instance, most order filters are not available when Marketing List Generation 23 choosing “non-purchasers”.
-
All Customers = Leads + Customers
-
Purchasers = Customers only. Keep in mind that someone can be a Customer in one Interest category, such as Chemicals, but a Lead in another Interest category, such as Service. If you are wondering why a particular person didn’t show up, that may be worth looking into.
-
Non-Purchasers = Leads only
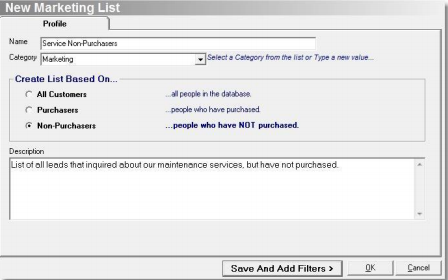
f. Description (optional but helpful, as the list is saved for future use)
g.Click ‘Save and Add Filters’ to proceed.
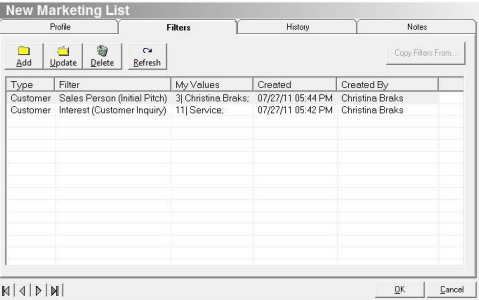
h. A new screen appears called ‘Marketing List Filter’ with a ‘Profile tab'

i. Select a filter from the drop down and specify particulars underneath. Don’t forget to look at the ‘In or Out’ box (if available) to decide if the options are included or excluded.
j. Click OK to continue.
k. When returned to the ‘Filters’ tab on the ‘New Marketing List’ screen:
-
Repeat the process by clicking the button ‘Add’ if desired
-
Click OK to finish adding filters and confirm.
l. You should see your new List populate in the “Marketing Lists” screen.
-
Execute the Marketing List (Print it out or Assign it to a Campaign Stream)
a. Highlight the list and click the button to ‘Execute List’. Pro Tip: execute all lists to Excel the first time run to ensure results are as expected.
-
To Excel: Sends the list to Excel.
-
To Label Queue: Sends the list to the label queue where you can select which labels to print and what printer to use.
-
To Labels (Avery 5160): Sends the list to a print preview formatted for Avery 5160 ( 1 ” x 2 5 / 8 ” ) sheet labels.
-
To Campaign Stream: Sends the list to a campaign stream.* Action Items will be created for the selected employee(s) based on the Campaign Stream. Sending lists to campaign streams is a quick and easy way to kick off action items for large groups of customers - for instance - following up with old service Leads. Best Practice: create another similar list in your test database to ensure the campaign stream generates action items as expected.
b. Select a Campaign Stream from the list
c. Enter Start Date of the First Action Item.
d. Assign action items* to a single employee or multiple employees.

Reports
A Marketing List is its own report. It is generated from the Administrative Tree or the Money Tree by filtering out past purchasers (Customers) from a Sales List.