
Do you find yourself typing the same information over and over again in Service Tech Notes, Special Instructions on Orders, Job Bills, and Job Work Orders?
Quick Text can save you time. It lets you save commonly used text, such as “Thank you for your business”, and then quickly add the text to any field that has the spell check feature enabled (look for the ABC icon).
Why use quick text?
-
It eliminates spelling, grammar, and punctuation errors in the commonly used text
-
Ensures that the correct information is added every time for repeated text such as the standard work completed in a pool opening/closing, or chimney sweep.
-
Encourage communication by providing users with the information they can easily add to customer facing or internal documentation.
Two Ways to Use Quick Text:
-
Menu: Right-click on a note field in the application that supports the quick text feature and select the text from the menu that appears.
-
Auto Code: Input the auto type code in a note field that supports the quick text feature and the application automatically adds the quick text to the field. For example, input "happyholiday" in a note field and the system automatically adds "Happy holidays from all of us here at...".
Quick text does not work on every field in the application, but it works on note fields in the following areas:
Using Quick Text with Evosus Mobile:
-
When entering Notes on the mobile device, click the Show Quick Text button or press/hold in the Tech Notes field until a list of Quick Text options appears. Select the Quick Text you need and it will be entered into the Tech Notes field.
-
You can edit notes you entered by tapping in the Tech Notes field.
Create a new quick text category (text type):
You need to create the text categories before you create the quick text.
-
Open the Quick Text screen (Administration > Service and Delivery > General Setup > Quick Text).
-
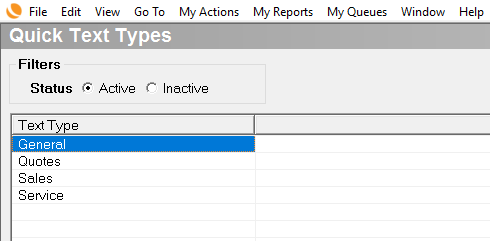
Click Add/Update Text Types. The Quick Text Types screen appears. This screen lists the existing text types.
-
Click Add. The Add Text Type screen appears.
-
Text Type: Input the name of the category. For example, Purchase Orders, Sales or Progress Bills.
-
Click OK when complete.
Create a new quick text:
-
Open the Quick Text screen (Administration > Service and Delivery > General Setup > Quick Text).
-
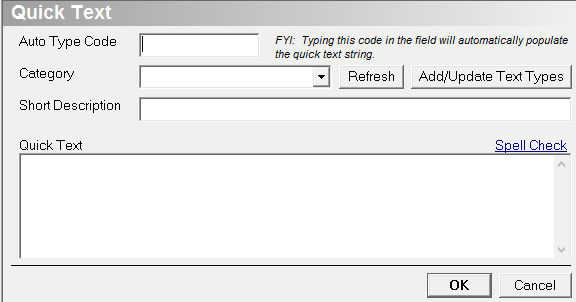
Click Add. The New Quick Text screen appears.
-
Auto Type Code: Use this code anywhere quick text is available to quickly add the desired text. For example, PC for pool closing, or RPR for repair.
-
Application: an example of how this feature will be used is if you input the auto type code in a note field, the application automatically adds the quick text to the field. For example, if you create an auto type code "happyholiday", users can input "happyholiday" in a note field and the system will automatically add "Happy holidays from all of us here at...".
-
This field is case-sensitive. If you capitalize the auto code, users also have to capitalize it.
-
The auto code shouldn't be a word that users would actually type. Remember, anytime the auto code is typed in a text field, the quick text is added.
-
Category: Categories are user-defined and allow you to group the quick text. For example, Sales, Service, Quotes and All. Click Add/Update Text Types to add a new category.
-
Short Description: This is the text that displays when selecting quick text from the list.
-
Quick Text: Input the message. For example "Thank you for your business." Quick Text can be as long or as short as you would like.
-
Click OK when complete.
Security Permission Required:
Related Video Content: