
Use the System Parameters screen to configure parameters in the application (Administration > System > Evosus Defaults > System Parameters).
System Tab:
- Use MARS (Multiple Active Result Set):MARS allows database connections to be shared for multiple queries, improving overall performance. Setting this parameter to "No" disables using MARS, resulting in the same behavior as previous versions of the app. NOTE: MARS is only supported with the new database driver.
- Consult Support being making a change to this setting.
- Use SQLOLEDB DB provider : Setting this to "Yes" causes Enterprise Retail to use the previously supported database driver instead of the new driver released with this version of the app.
- Consult Support being making a change to this setting.
-
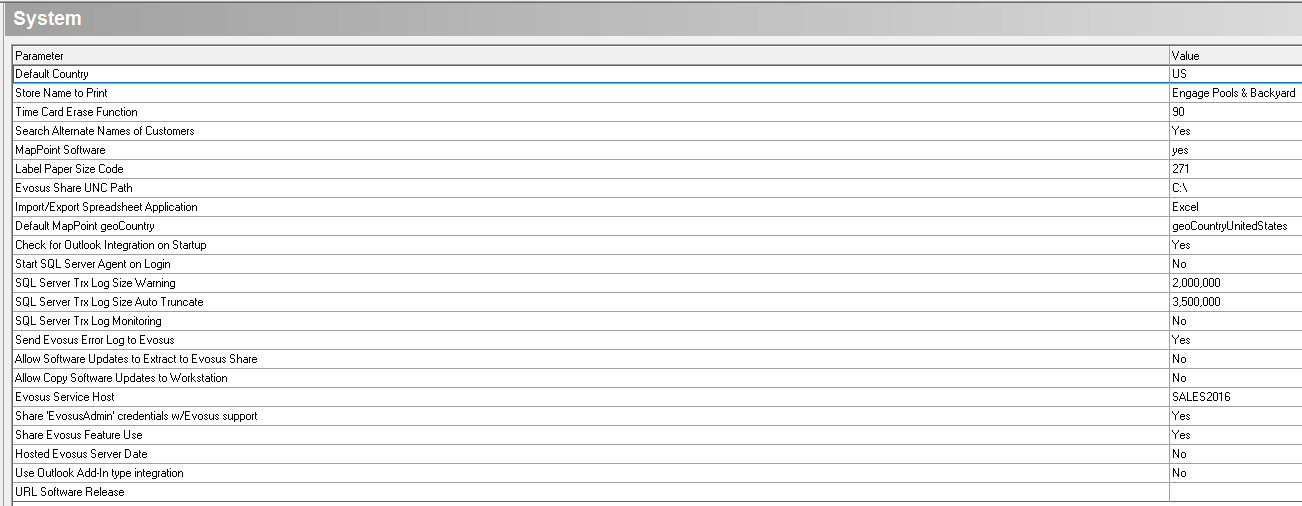
Default Country: This will be the default country that each address automatically starts with. Use the two character abbreviation ("US" for the United States and "CA" for Canada).
-
Store Name to Print: This is the Store Name that prints on Quotes, Orders, POS receipts, Mailing Labels, and Reports. This is helpful if you have many different locations and have named them differently when you created the stores/departments. This is where you can put the overall company name that will be used. Leave this field blank to use the Store Name that people Log into.
-
Working Directory: (DO NOT CHANGE this parameter unless instructed to do so by Evosus® Support) This is the working directory on the hard drive where Evosus® writes temporary printing files for functionality, such as the Emailing of reports.
-
Time Card Erase Feature: Enter the number of seconds that you want the Time Card Punch Erase button to be active after an employee punches in or out. The Erase Button lets employees remove their own punch in case they make a mistake.
-
Search Alternate Names of Customers: Enter ‘Yes’ to allow Evosus® to search for alternate customer names when performing a customer search. Enter No to search for only primary customer names.
-
MapPoint Software: Enter Yes or No. Indicate whether or not you will integrate with Microsoft MapPoint Mapping Software.
-
Label Paper Size code: Enter Page Size of your Label Printer Labels. Enter the Paper Size Number that is needed by your label printer. Example, use 271 for 2.4 x 1-inch label stock for the Cognitive printer. Call Evosus® Support for more help with this parameter.
-
Evosus Share UNC Path: Enter the UNC Path to the Evosus Share Folder. This is the Share Folder Evosus® will use when saving documents related to Evosus® (such as Docs/Pics).
-
Import/Export Spreadsheet Application: Enter Excel or OpenOffice. This indicates which spreadsheet application you will use when exporting spreadsheet reports and lists out of Evosus®.
-
Default MapPoint geoCountry: Enter geoCountryUnitedStates or geoCountryCanada. This indicates which country will contain the majority of the addresses in your customer database.
Marketing Tab:
-
Months Separating Duplicate Interests: Enter the number of months that have to elapse before a duplicate Customer Interest can be entered by a salesperson. Example: Bob Inquires about a Spa on 1/1/2002 and then goes thru the Pre-Sale marketing campaign, but does not purchase. He then inquires again about a spa on 9/1/2002. In this example, if you set this parameter to less than 9 months the salesperson would be able to create a new Spa Interest and start this customer on the Spa Pre-Sale Marketing Campaign again. There is one other system rule at work here. Before entering a duplicate Customer Interest, the Pre-Sale Marketing or Pre-Sale Follow-up campaigns for the original Inquiry will have to be fully completed.
-
Force Contact Type Selection: Enter ‘Yes’ to force the user to select a Customer Interest Contact Type (Add New Interest and Add New Customer screens). Enter No to default to Face to Face.
Inventory Tab:
-
Force Two Decimal Unit Price
-
Force Two Decimal Discount:
-
Serial Number Entry Model: Enter Yes or No. Default the Model to the Item Description field when adding a new serial number.
-
Serial Number Entry Year: Enter Yes or No. Default the year to the Current Year when adding a new serial number.
-
Physical Count Sort: Enter 1 to sort Physical Count Report by Item Code or 2 to Sort Physical Count Report by Item Description.
-
Use Item Code As UPC: Enter Yes or No. Enter YES if you want Evosus® to default the UPC to the in-house Item Code when adding a new item to the inventory tree. This happens only if you do not explicitly type in the real UPC.
-
Auto Close Purchase Order: Enter the number of days you want Evosus® to wait before automatically closing Purchases Orders with Full-Receipt Status. Enter -1 if you never want Evosus® to auto-close Purchase Orders.
-
Auto Close Return Goods Authorization: Enter the number of days you want Evosus® to wait before automatically closing Return Goods Authorizations with Full-Receipt Status. Enter -1 if you never want Evosus® to auto-close Purchase Orders.
-
Barcode Prints To: Enter LABEL PRINTER or LABEL AVERY. Enter whether you will print to a label printer with a continuous stream of labels or use Avery 5160 Label sheets.
-
Receiving - Auto Assign Serial Numbers: Enter Yes if you want Evosus® to auto assign serial numbers to customers associated on a Purchase Orders. Evosus® will prompt you to confirm this action when receiving the serial number.
-
Print Stock Transfer Receipts: Enter ‘Yes’ if by default you want to print a receipt for stock transfers.
-
Inventory Tree Item Sort: Select how the items are sorted on the inventory tree.
a. Sort the items by item description
b. Sort the items by item code.
c. Sort the items by item class (A-F). The most popular items appear at the top.
-
Purchase Order Company Name: Select what is used as the default ship to
a. Default the ship to company to your company name.
b. Default the ship to company name to your store name.
c. Default the ship to company name to your stock site name.
-
Physical Count Expire Days: Enter the number of days (1-60) from the start date that the physical count expires and cannot be posted.
-
Item Docs/Pics default folder(s): You can enter multiple folder names. This folder is automatically shown on the Item Doc/Pics screen.

- Pending Returns - Auto Move to Inventory: Setting the "Pending Returns - Auto Move to Inventory" parameter will allow the items to flow automatically through the Pending Returned Items queue so that an employee does not need to make a decision. The process that automatically moves returned items from the Pending Returns Queue back into Inventory occurs every 5 minutes.
- Item Lookup Quantity: When looking up inventory items from a quote, order, pos, or job display the quantity on hand data. Enter yes to show the quantity on hand or enter no to NOT show the quantity on hand information by default. Not showing the quantity on hand information will make the screen display faster in bigger companies with lots of stock sites.
- Force Two Decimal Unit Price: Force a two decimal place unit price. Not recommended for Australia or New Zealand and other tax inclusive countries.
- Force Two Decimal Discount: Force a two decimal place discount amount. Not recommended for Australia or New Zealand and other tax inclusive countries.
Orders and Invoices Tab:
-
Quote Expiration Days: Enter the default number of days that a new quote expires in from the date of creation.
-
Print Item Codes on Quotes: Enter Yes to Print the Item Codes on Sales Orders. Enter No to just print the Item Description.
-
Print Item Codes on Sales Orders: Enter Yes to Print the Item Codes on Sales Orders. Enter No to just print the Item Description.
-
Print Item Codes on Service Orders: Enter Yes to Print the Item Codes on Service. Enter No to just print the Item Description.
-
Enable Freight Field on Sales/Service: Enter Yes to allow entry of freight in the upper right corner on the sales/service orders. Enter No to disable this field and force the selection of a specific line item that identifies freight.
-
Notify of Back Ordered Items: Enter the numbers days between notices that Evosus® should send. The days are based off the Invoice Date of an Order. If there are items on the invoice that are waiting for delivery, the primary salesperson will be notified of back ordered items via an action item.
-
On Quote – Print Line Separators: Enter Yes to print line separators on the printed document. Enter No to not print line separators.
-
On Order – Print Line Separators: Enter Yes to print line separators on the printed document. Enter No to not print line separators.
-
You Saved Dollar Amount Text: Enter the percentage that the savings has to be greater than compared to the total to display the "You Saved" dollar amount. This applies to Quotes, Sales and Service.
-
On Quote – Print Retail Unit Price: Enter Yes or No. Enter Yes to Retail Unit Price on Quotes next to the extended unit price.
-
On Sale – Print Retail Unit Price: Enter Yes or No. Enter Yes to Retail Unit Price on Sales next to the extended unit price.
-
On Service – Print Retail Unit Price: Enter Yes or No. Enter ‘Yes’ to print Retail Unit Price on Service Invoice next to the extended unit price.
-
Printed Retail Price column Head: Enter the Retail Unit Price Column Name. Suggestions: List Price, Retail, MSRP...
-
Big Sale Dollar Amount: Enter a dollar amount or ent